When placing your projector off-center, focus on physically adjusting its position or using a mount with lens shift features to keep the image straight without relying on digital keystone correction. These options help preserve image quality and avoid blurriness caused by digital adjustments. Avoid excessive keystone correction, which can distort the picture. By optimizing your setup through positioning and lens shift, you’ll get a clear image. Keep exploring to discover more tips for perfect off-center projection.
Key Takeaways
- Use adjustable mounts or ceiling brackets with lateral shift to physically position the projector off-center without tilting.
- Align the projector as perpendicular to the screen as possible to minimize the need for digital keystone correction.
- Prioritize physical adjustments and lens shift features over digital keystone correction to preserve image quality.
- Employ test patterns and calibration tools to fine-tune alignment after physical setup, reducing reliance on digital corrections.
- Combine minimal digital keystone correction with physical positioning for the best balance of image clarity and proper projection.
Have you ever wondered if you can position your projector off-center without compromising image quality? The answer is yes, but it requires understanding the right mounting options and calibration techniques to avoid keystone distortion and image degradation. When you place a projector away from the center of your screen or wall, you risk skewed images that can be distracting and diminish your viewing experience. Fortunately, there are ways to correct this without resorting to digital keystone adjustments that can cause loss of resolution or picture quality.
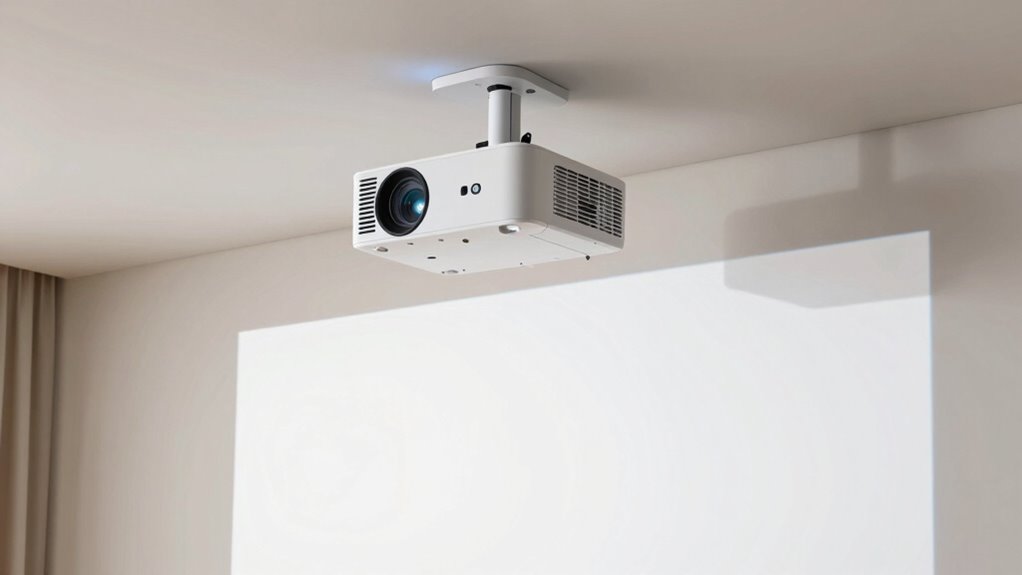
First, consider your mounting options carefully. The type of mount you choose considerably impacts how easily you can position the projector off-center. Fixed mounts are usually limited to centered placement, but adjustable mounts, such as ceiling mounts with lateral shift capabilities, give you more flexibility. Some mounts allow you to physically shift the projector left or right without tilting or cropping the image. Alternatively, a tripod or a portable mount can be adjusted more freely, making off-center positioning straightforward. Whichever option you pick, ensure it supports the projector’s weight and allows precise placement.
Once you’ve mounted your projector, the key to maintaining image quality lies in calibration techniques. Most projectors come with built-in settings that enable you to correct keystone distortion, but over-reliance on digital correction can reduce image sharpness. Instead, try to physically align the projector as close to perpendicular as possible to the screen’s surface. When perfect placement isn’t feasible, use the projector’s keystone correction feature sparingly. Fine-tuning keystone adjustments digitally can help straighten the image, but excessive use might introduce blurriness or pixelation. To avoid this, many projectors include lens shift capabilities—these allow you to move the projected image vertically or horizontally without affecting focus or resolution. Utilizing lens shift is often the best way to correct off-center placement while preserving image quality.
Physically align your projector close to perpendicular to preserve image clarity and minimize digital correction.
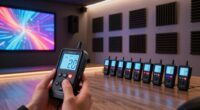
Additionally, understanding and utilizing the projector’s calibration options can further enhance the image quality and alignment. Calibration techniques also involve adjusting the projector’s settings for ideal picture quality. Start by aligning the projector as accurately as possible with the screen before making any digital corrections. Use test patterns or calibration tools to ensure the image is aligned and proportioned correctly. Some projectors have automatic calibration features that can help fine-tune the image for off-center placement, but manual adjustments often yield the best results. Always aim for minimal digital correction, relying on physical adjustments first. This approach ensures you preserve the clarity, sharpness, and overall picture fidelity.

Golf Simulator Projector Cover - Floor Mounted Enclosure with Cooling Fan for Optimal Protection of Outdoor Golf Simulation Projectors - Compatible with Leading Golf Simulators and Projectors
✅【Economical Solution】The Golf Simulator Projector Cover offers a budget-friendly alternative to ceiling installations, allowing you to easily position...
As an affiliate, we earn on qualifying purchases.
Frequently Asked Questions
Can Adjusting the Projector’s Lens Fix Off-Center Images?
Yes, adjusting the projector’s lens can fix off-center images. By carefully tweaking the lens adjustment, you can realign the image without causing keystone damage. This process allows you to fine-tune the image alignment directly through the lens, helping to center your display properly. Just make certain you make small, precise adjustments to avoid distortion, and always check the image after each tweak for the best results.
Will Repositioning the Projector Cause Damage to the Device?
Repositioning your projector is like fine-tuning a musical instrument; it won’t harm the device if you handle it carefully. Make certain the mounting is stable before moving it to prevent damage. Repositioning can improve image alignment, but always recalibrate the lens afterward to maintain picture quality. As long as you proceed gently and check the mounting stability, your projector remains safe, and your setup becomes picture-perfect.
Are There Specific Projector Mounts That Minimize Keystone Issues?
Yes, certain projector mounts offer better compatibility and installation flexibility, reducing keystone issues. Look for mounts with adjustable arms or pivot points that allow precise positioning without forcing the projector into an off-center spot. These mounts help you align your projector correctly, minimizing keystone distortion. By selecting the right mount designed for your setup, you can enjoy a seamless image without compromising device safety or picture quality.
How Does Room Lighting Influence Off-Center Projection Correction?
Did you know that 70% of viewers find ambient lighting impacts image clarity? Room lighting greatly influences off-center projection correction because bright ambient light can wash out colors and reduce contrast, making keystone adjustments less effective. To optimize image quality, dim ambient lighting and increase room contrast. This helps your projector compensate for off-center placement without losing image quality or damaging your keystone correction, ensuring a clear, vibrant display.
Is It Better to Correct Off-Center Projection Digitally or Physically?
It’s better to start with physical adjustment to correct off-center projection, as it preserves image quality. Make sure your projector is properly positioned, adjusting the mount or tripod to center the image. Use digital correction only as a last resort, since it can reduce resolution and clarity. By prioritizing physical adjustments, you minimize keystone damage and ensure a sharper, more accurate picture for your viewing experience.

Projector Dust Cover for Ceiling Video Projector at Home or Outdoor Installation, Waterproof Dustproof Protection Case, 14"x14"x 9"
Ultimate Protection: waterproof cover protects your video projector from dust, scratches, and water damage or other possible factors...
As an affiliate, we earn on qualifying purchases.
Conclusion
To conclude, correcting an off-center projector without keystone damage is simple if you know the right steps. Just remember, about 60% of projector users face placement issues at some point, so you’re not alone. By adjusting the projector or using software correction, you can get a perfectly aligned image without risking damage. Keep these tips in mind, and you’ll enjoy a clear, professional display every time—no matter where you set it up.

Projector Dust Cover,Projector Cover Outdoor Case Protective,Dust-Proof,UV-Resistant,Moisture-Proof,Fit for Ceiling Video Mounted Equipment Enclosure Oxford,Cloth Drawstring(13.7" X 13.7" X 8.6")
【Projector Dust Cover Material and Design】: Mainly made of waterproof elastic Oxford cloth, with a sturdy and durable...
As an affiliate, we earn on qualifying purchases.

Projector Dust Cover,Fit for Ceiling Mounted Projector and Universa Projector Waterproof,Dust-Proof, UV-Resistant Cover Oxford Cloth,Dimensions13.7" x 13.7" X 8.6"
Projector dust cover: Protect the projector surface from damage. Keep the projector clean and prevent it from being...
As an affiliate, we earn on qualifying purchases.