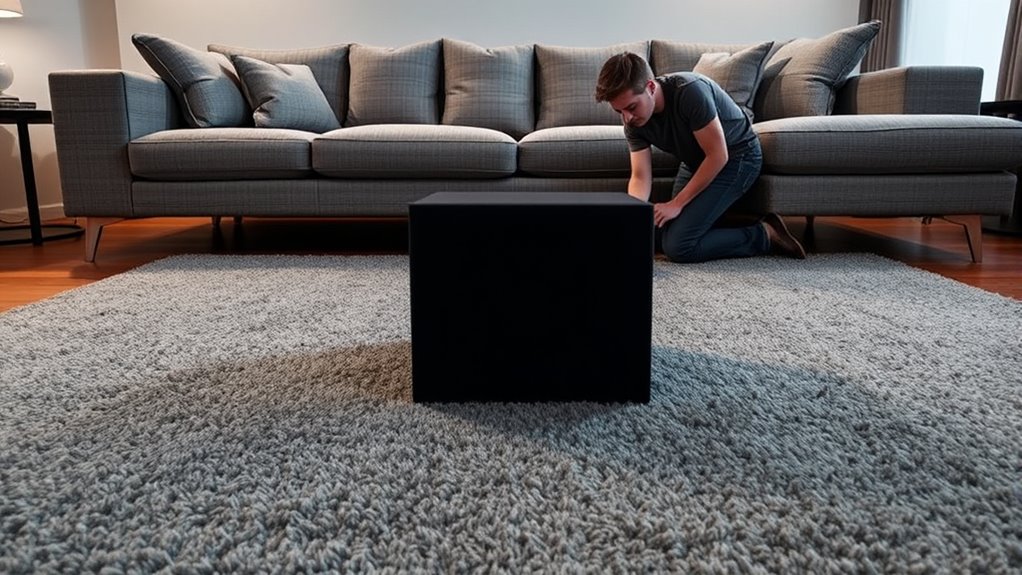
To find the best spot for your subwoofer, try the ‘crawl test’. Start by placing your sub near your main listening area, then play some bass-heavy music. Get on your hands and knees and crawl around, listening closely for where the bass sounds deepest and most even. Mark that spot, then move your sub there for ideal performance. Keep exploring small adjustments—if you want to learn more, there’s plenty of tips to help you get perfect bass.
Key Takeaways
- The ‘Crawl Test’ involves moving around on hands and knees to find where bass sounds most balanced and full.
- It helps identify the best subwoofer placement without complex tools by listening for even, deep bass.
- Clear the testing area of objects and soft materials to accurately assess bass response during the crawl.
- Mark the ideal spots found during the test, then place the subwoofer there for optimal sound quality.
- Fine-tune the subwoofer’s position and settings afterward to achieve tight, even bass in your room.
Understanding Why Placement Matters for Your Subwoofer

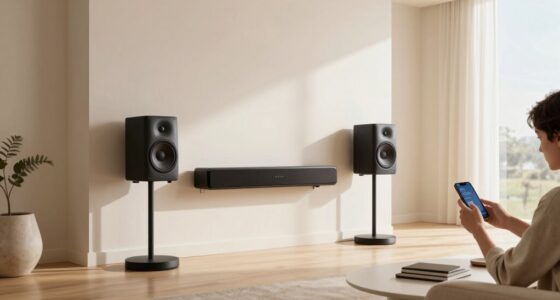
Your subwoofer’s placement profoundly impacts the quality of your sound experience because it affects how bass frequencies disperse throughout the room. When positioned correctly, your subwoofer can deliver deep, even bass that fills the space without rattling or sounding muddy. Poor placement may cause boomy, uneven bass, making certain areas feel overpowering while others lack depth. Factors like proximity to walls and corners influence how sound waves bounce and reinforce each other. Moving your subwoofer slightly can dramatically improve clarity and fullness. Understanding the importance of placement helps you optimize your setup, ensuring you get the best possible sound from your system. Proper positioning isn’t just about convenience; it’s about creating a balanced, immersive listening environment. Room acoustics also play a crucial role in how sound behaves and should be considered when placing your subwoofer. Additionally, the crawling test is a simple method to find the optimal spot by assessing how the bass feels as you move around the room. To enhance your understanding, considering sound wave behavior can offer deeper insights into achieving the best placement, especially since Glycolic acid is known to improve skin texture and brightness, which is unrelated but highlights the importance of proper application techniques. Recognizing how room dimensions influence sound reflection can further help in fine-tuning your subwoofer placement for optimal performance.
What Is the ‘Crawl Test’ and How Did It Start?
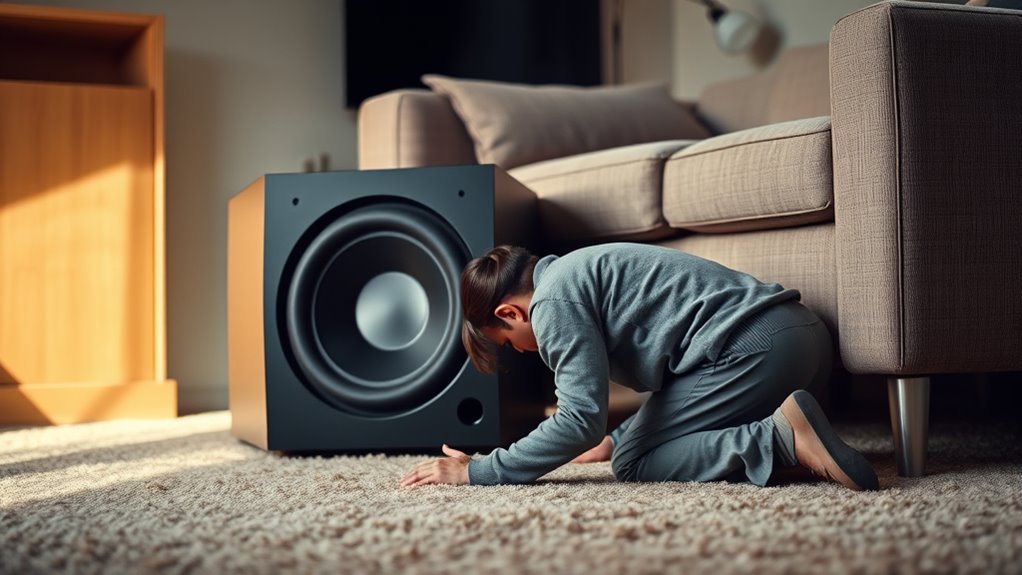
One practical way to determine the best placement for your subwoofer is by performing the ‘Crawl Test.’ This method involves placing your subwoofer in your main listening spot and then moving around the room on your hands and knees, listening carefully to how the bass sounds in different locations. The goal is to identify where the bass sounds most even and balanced. The ‘Crawl Test’ started as a simple, intuitive technique used by audio enthusiasts and sound engineers to find the ideal spot for bass response without complicated measurements. Over time, it gained popularity among home audio hobbyists because it’s easy to do and doesn’t require specialized equipment. Basically, it’s a practical, hands-on way to tune your room and improve your subwoofer’s performance.
Preparing Your Room for the Test

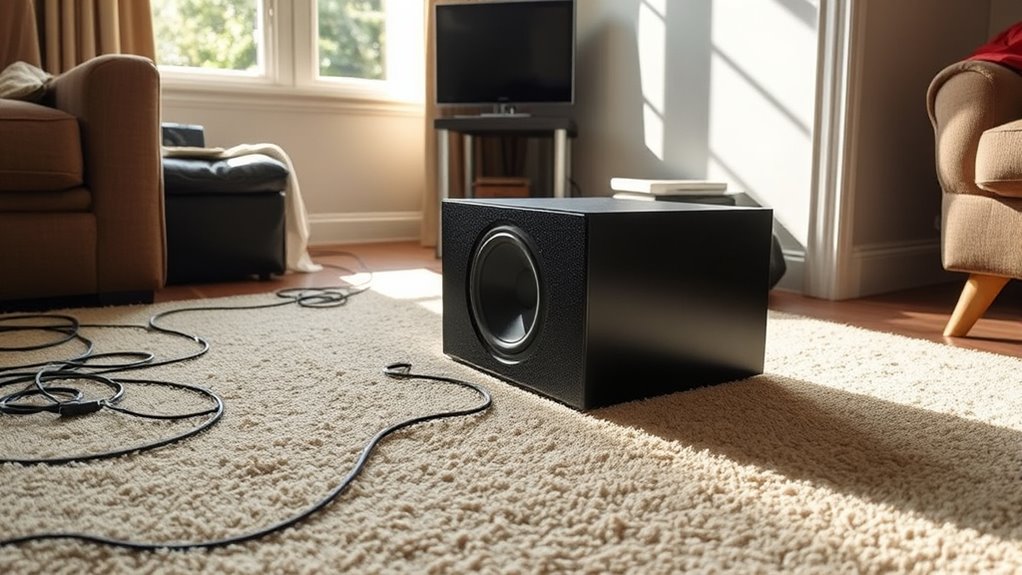
Before testing your subwoofer, you need to clear the space around it to prevent obstructions. Minimizing echoes in the room helps guarantee accurate sound measurements. A clean, quiet environment makes the test more effective and straightforward. Creating a calm environment by reducing noise and distractions further enhances the accuracy of your subwoofer placement. Additionally, considering the free floating concept can help in setting up a space that minimizes vibrations and unwanted resonances. Paying attention to room acoustics can also improve the results by reducing reflective surfaces that distort sound. Incorporating proper soundproofing techniques can further optimize the testing conditions. Being mindful of air quality can also contribute to a more comfortable testing environment, ensuring you stay focused and alert during the process.
Clear the Space
Clearing the space is a crucial first step to guarantee accurate subwoofer testing. Remove any objects near the testing area, including furniture, decorations, and loose items that could interfere with sound or cause distractions. A clutter-free space ensures you can move the subwoofer easily and place it without obstacles. Clear pathways around the room so you can freely walk and adjust the subwoofer during the test. Eliminating clutter also prevents accidental bumps or knocks that might alter its position. Make sure the floor is clear of toys, cables, or other items that could affect stability. Additionally, a tidy environment helps prevent sound interference and ensures that your measurements reflect true subwoofer performance. Creating a clean, open environment is essential for an effective crawl test, helping you find the ideal subwoofer placement for your space. Proper room setup also enhances sound accuracy and overall listening experience. Ensuring a well-organized space contributes to better acoustic conditions, leading to more reliable placement results.
Minimize Echoes
Minimizing echoes is essential to achieving accurate subwoofer placement, as excessive reflections can distort sound measurements and obscure true audio performance. To reduce echoes, focus on treating your room with soft materials that absorb sound. Rugs, curtains, and upholstered furniture help dampen reflections, creating a clearer listening environment. Consider placing bass traps in corners to further minimize low-frequency resonance. Here’s a quick overview:
| Material | Placement Tips | Effect |
|---|---|---|
| Acoustic Panels | On walls at reflection points | Absorbs mid to high frequencies |
| Rugs & Curtains | Cover reflective surfaces | Reduces echo and flutter echoes |
| Bass Traps | Corners of room | Damps low-frequency resonances |
Additionally, understanding the importance of room acoustics can help you optimize your setup for better sound clarity.
The Step-by-Step Process of the Crawl Test

To effectively determine the ideal subwoofer placement, you’ll want to perform a crawl test. Start by placing your subwoofer near your main listening area. Play a bass-heavy track at a moderate volume. Then, get down on your hands and knees and crawl around your room. Pay close attention to the bass response at different spots. Notice where the bass sounds full, deep, and even. Mark these spots with painter’s tape or a sticky note. Move the subwoofer to each marked location and repeat the process. This hands-on approach helps you identify the best position for balanced, powerful bass. The goal is to find the spot where the bass feels tight, even, and satisfying, ensuring a great listening experience. Proper placement is crucial to achieving consistent and clear bass performance across your listening area. Additionally, understanding room acoustics can further enhance your subwoofer setup and overall sound quality.
Listening for the Best Bass Spot
Listening carefully to the bass response at each potential spot is essential for pinpointing the best subwoofer placement. Pay close attention to how the bass sounds—whether it’s tight, deep, or boomy. Move around slowly, listening for spots where the bass feels balanced and even. Trust your ears rather than visuals alone, as the sound is what matters most. Additionally, room acoustics can significantly influence how the bass sounds, so consider how reflective surfaces and furnishings affect your listening experience. Being aware of sound perception helps you better interpret what your ears are telling you during this process. This awareness can help you identify optimal placement more effectively. When testing different locations, keep in mind that AI tools and sound analysis software can assist in pinpointing the best spot by providing objective data. Consider these factors during listening:
Listen carefully to bass response at each spot; trust your ears to find the most balanced, natural sound.
- Consistent, punchy bass with minimal boominess
- Clear, well-defined low frequencies
- Absence of muddy or muffled sounds
- Smooth integration with your main speakers
It’s also helpful to understand how sound reflection can impact the bass response, guiding you toward more accurate placement decisions. Focus on areas where the bass feels fullest and most natural. This listening phase ensures you identify the most promising locations before final placement adjustments.
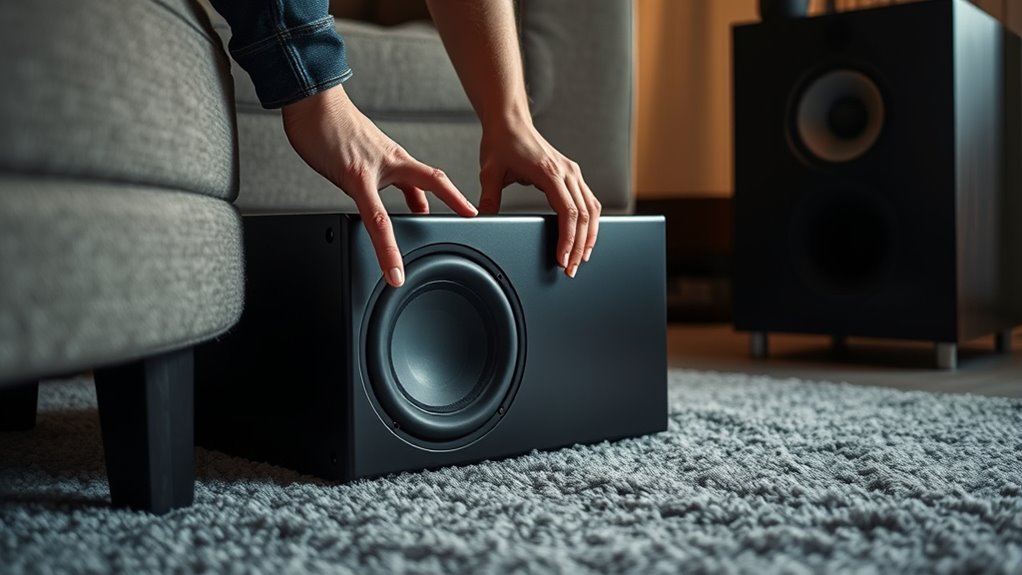
Moving the Subwoofer to Its Ideal Location

Once you’ve identified the spot with the best bass response, it’s time to move the subwoofer to its ideal location. Start by carefully lifting and placing it in that spot, avoiding awkward or unstable positions. Keep in mind that walls, corners, and furniture can amplify bass, so position it accordingly. If possible, use furniture or acoustic treatments to help shape the sound. Room acoustics also play a crucial role in achieving optimal bass response, and considering speaker placement can further enhance sound quality. Proper subwoofer positioning is essential for achieving a balanced soundstage and avoiding boomy or uneven bass. Once in place, sit in your usual listening position and listen closely. Adjust the subwoofer slightly if the bass feels uneven or boomy. Remember, small shifts can make a big difference. The goal is to find a spot where the bass is smooth, even, and full without overwhelming the room. This placement ensures you’ll get the best possible sound experience.
Fine-Tuning the Position for Optimal Sound
Even after placing your subwoofer in the ideal spot, small adjustments can substantially enhance sound quality. You might find that slight shifts or angles make a noticeable difference. To fine-tune effectively, consider these tips:
- Adjust the subwoofer’s height to reduce bass boominess or muddiness.
- Tilt or angle the sub slightly to direct sound toward your listening area.
- Experiment with minor lateral moves—a few inches can improve bass response.
- Use acoustic treatments like rugs or curtains nearby to absorb unwanted reflections.
These small tweaks help you dial in the perfect balance, ensuring the bass is tight, punchy, and well-integrated with your overall sound. Patience and incremental changes lead to the best listening experience.
Additional Tips to Improve Subwoofer Performance

To get the most out of your subwoofer, consider additional adjustments beyond placement and fine-tuning. First, check your receiver’s crossover settings; setting it correctly guarantees your subwoofer blends seamlessly with your main speakers. Adjust the volume level so bass is impactful but not overwhelming. Use the phase switch or control to align your subwoofer’s sound with the rest of your system, ensuring a cohesive bass response. Consider adding a bass trap or acoustic treatment to reduce room resonances that can muddy sound clarity. If your subwoofer has EQ options, fine-tune the low frequencies to suit your room’s acoustics. Finally, experiment with different listening positions and settings to find the configuration that delivers the best, most balanced bass experience in your space.
Common Mistakes to Avoid During Placement
Many people overlook how room acoustics affect your subwoofer’s sound, leading to uneven bass. You might also disregard the importance of placing your subwoofer symmetrically, which can cause phase issues and muddled audio. Avoid these mistakes to ensure your subwoofer delivers clear, balanced bass across your space.
Ignoring Room Acoustics
Ignoring room acoustics is a common mistake that can substantially compromise your subwoofer’s performance. Your room’s shape, size, and materials influence how bass frequencies behave, affecting clarity and depth. Failing to take into account these factors can lead to boomy, muddy, or uneven bass response. To avoid this, be aware of:
- Reflective surfaces that cause standing waves and muddiness
- Room corners amplifying bass excessively
- Large furniture or curtains absorbing or diffusing sound
- Room size impacting bass decay and resonance
Overlooking Subwoofer Symmetry
Proper subwoofer placement isn’t just about finding a spot with good sound; ensuring the subwoofer is symmetrically positioned in your room can make a significant difference in sound quality. When you overlook symmetry, you risk creating uneven bass response, which can lead to boomy or hollow sounds depending on your seating position. Place your subwoofer so that it’s evenly balanced relative to the room’s main listening area and furniture. This helps prevent phase cancellation and standing waves that distort bass. Use measurements or a mirror to check that the subwoofer is aligned with other key elements in the room. Symmetrical placement promotes a more consistent, natural bass response, ensuring you enjoy clear, balanced sound from every seat.
Enjoying Richer, Deeper Bass in Your Space
To enjoy richer, deeper bass in your space, the placement of your subwoofer plays a crucial role. Proper positioning can fill your room with powerful, immersive sound. Start by experimenting with different locations, avoiding corners initially to prevent boomy bass. Elevate your subwoofer slightly off the floor to improve sound clarity. Use the crawl test by placing the sub where you sit and listening for the best bass response. Keep these tips in mind:
- Avoid placing the sub directly against walls or in corners
- Use furniture and room features to diffuse sound waves
- Consider symmetry relative to your main listening area
- Adjust the sub’s position gradually for ideal bass depth
These steps help you find a spot that enhances bass richness without overwhelming your space.
Frequently Asked Questions
Can the Crawl Test Be Used for All Room Sizes?
Yes, you can use the crawl test for all room sizes. It helps you find the best subwoofer placement by letting you identify where bass sounds most even and balanced. Whether your room is small or large, crawling around and listening for the smoothest, most consistent bass spot ensures ideal sound. Just keep in mind that larger rooms may require additional adjustments or multiple subwoofers for perfect bass coverage.
How Often Should I Redo the Crawl Test?
Like rewinding your favorite tape deck, you should redo the crawl test whenever you notice a change in your room’s acoustics or subwoofer performance. That might be after rearranging furniture, adding new décor, or upgrading your audio gear. Typically, doing it every 6 to 12 months keeps your sound optimized. Regular checks guarantee your subwoofer’s placement delivers the best bass, keeping your listening experience consistently epic.
Does Furniture Affect the Crawl Test Results?
Yes, furniture can affect your crawl test results. Large or dense pieces may block or absorb bass waves, making spots sound better or worse than they actually are. To get accurate results, try to perform the test with minimal furniture in the room, or temporarily move pieces away from the area you’re testing. This way, you’ll find the best placement for your subwoofer without interference.
Is the Crawl Test Suitable for All Types of Subwoofers?
Did you know that over 60% of audiophiles prefer the crawl test for ideal subwoofer placement? The crawl test works well for most subwoofers, but it’s not perfect for all types. For example, some ultra-compact or specialized subwoofers might not respond as predictably. You should consider the subwoofer’s size, design, and power before relying solely on the crawl test, and always trust your ears for the best sound.
Can the Crawl Test Help Improve Sound in Multi-Room Setups?
Yes, the crawl test can help improve sound in multi-room setups. By moving around your space with the subwoofer playing, you identify where bass feels strongest or weakest. This allows you to optimize placement for each room, ensuring balanced and consistent sound throughout your home. Adjusting subwoofer positions based on the crawl test results helps eliminate dead spots and enhances overall audio quality across multiple rooms.
Conclusion
When you finally find that perfect spot for your subwoofer using the crawl test, it’s like discovering a hidden treasure in your own home. That deep, rich bass fills the room unexpectedly, transforming your space into a personal concert hall. It’s amazing how a simple test can open such a powerful sound. Trust the process, and enjoy the surprising, joyful moments when your favorite music or movies come alive with deeper, fuller bass.