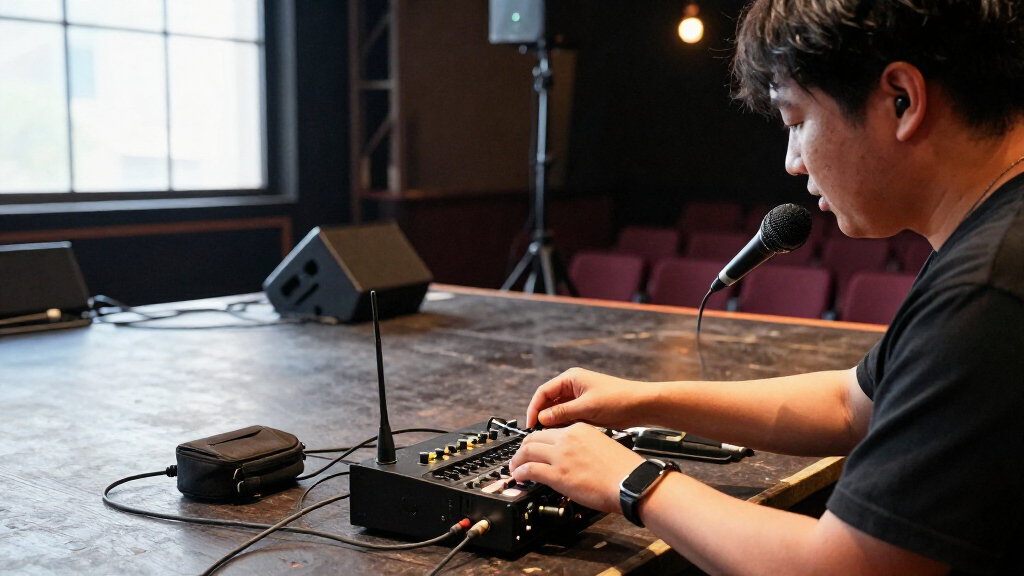

Set up a wireless microphone system by matching its transmitter and receiver, choosing a clear radio channel, connecting the receiver to a mixer or powered speaker, and testing the audio. This guide is for presenters, performers, and event operators with basic audio equipment knowledge. Allow 20-40 minutes, including a walk test in the room where you will use the microphone.

Get audio and creator gear delivered free with Prime
- Fast, free delivery on millions of items
- Prime Video, Amazon Music and more included
- Member-only deals all year

Phenyx Pro 4 Channel UHF Auto Scan Wireless Microphone System PTU-7000-4H
- ✔ Channels: 4
- ✔ Frequency options: 40 selectable frequencies per channel; 160 total options
- ✔ Wireless band: UHF; listed range 530–580 MHz

Phenyx Pro Dual UHF Auto Scan Handheld Wireless Microphone System PTU-71-2H
- ✔ Channels: 2
- ✔ Frequency options: 100 selectable frequencies per channel
- ✔ Wireless band: UHF; channels listed at 536.57–561.32 MHz and 562.37–587.12 MHz
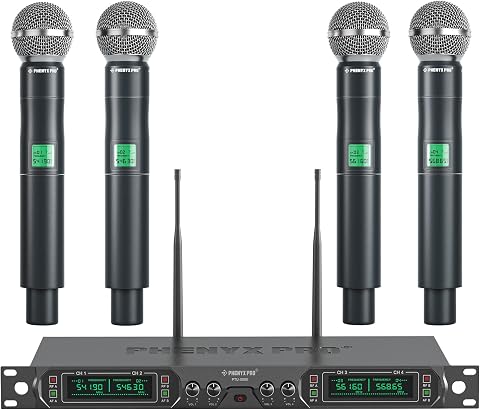
Phenyx Pro 4-Ch UHF Fixed Frequency Wireless Microphone System PTU-5000-4H
- ✔ Channels: 4
- ✔ Frequencies: Fixed at 541.9, 546.3, 561.6 and 568.65 MHz
- ✔ Stated range: Up to 260 ft line of sight
Difficulty: Beginner | Time: 20-40 minutes
What You’ll Need
Tools & Materials:
- Wireless microphone transmitter and matching receiver
- Audio cable compatible with the receiver output and mixer or speaker input
- Mixer or powered speaker
- Fresh batteries or fully charged transmitter battery
- Headphones, if available, for checking mixer output
Knowledge:
- Basic ability to connect audio cables and adjust input gain and volume
- Ability to identify the mixer or speaker input that will receive the microphone
Check the system manual for supported frequencies, pairing steps, antenna placement, and output level. Local rules limit which radio frequencies may be used; use the system’s approved region setting and do not select a frequency simply because it appears open. Keep a spare set of the correct batteries available.
Phenyx Pro 4 Channel UHF Auto Scan Wireless Microphone System PTU-7000-4H
For events where four people may need microphones at once, the PTU-7000-4H makes the strongest all-round case in this group. Its receiver offers four independent channels, while each channel has 40 selectable frequencies; auto scan helps locate a cleaner option and IR sync pairs a handheld with the receiver. That combination is more adaptable than the PTU-5000-4H’s fixed-frequency design, particularly when the system has to be set up in different venues. The 328-foot line-of-sight range also matches the two-channel PTU-71-2H’s published reach.Four individual XLR outputs let an operator adjust or route each microphone separately through a compatible mixer, and the mixed 1/4-inch output provides a simpler combined connection. Rack ears suit installed or touring racks, while mute controls help speakers pause without switching off a microphone. The tradeoff is that four wireless channels still require planning: selectable frequencies do not remove the need to coordinate the system with other RF equipment. It also takes more receiver space and setup attention than the PTU-71-2H, which makes more sense when only two people need microphones. Choose this model for flexible four-person events; skip it if your needs are limited to a pair of handhelds or a fixed-frequency setup is sufficient.
Pros:
- Four independent wireless channels
- Auto scan and IR sync support quicker coordination
- Four individual XLR outputs plus a mixed 1/4-inch output
- Up to 328 feet of stated line-of-sight range
Cons:
- Four channels require more frequency planning than a two-mic setup
- Published range assumes line of sight and may not reflect venue conditions
- Receiver and included handhelds need an external PA or mixer for sound output
Best for: Churches, event teams and small stages that need four handhelds, separate mixer feeds and frequency adjustment between venues.
Not ideal for: Buyers who need only two microphones, or who want a minimal system with no frequency setup to manage.
Bottom line: We recommend the PTU-7000-4H for buyers who need four mics and want more frequency flexibility than a fixed-frequency system provides.
“We recommend the PTU-7000-4H for buyers who need four mics and want more frequency flexibility than a fixed-frequency system provides.”
Phenyx Pro Dual UHF Auto Scan Handheld Wireless Microphone System PTU-71-2H
When two people need to share a stage, the PTU-71-2H avoids the extra channels and receiver capacity of the PTU-7000-4H. It pairs two handheld microphones with a dual-channel receiver and gives each channel 100 selectable UHF frequencies. Auto scan can find a less congested frequency, and a lock function helps prevent accidental changes once the system is set. Those controls make this a more flexible choice than the PTU-5000-4H if frequency conditions may vary, though the PTU-7000-4H offers four channels for groups that have outgrown a pair.The manufacturer lists a line-of-sight range up to 328 feet, and the cardioid dynamic capsules are intended to focus on the speaker while reducing surrounding pickup. Metal construction and replaceable microphone heads are useful for a system expected to be handled regularly. A mute switch provides a quick pause, but the listed connection is a 1/4-inch receiver output with an adapter in the box; buyers who need separate feeds for two microphones should check their mixer requirements, since this product information does not list individual XLR outputs. It is a sensible match for duets, presentations and karaoke hosts, but not for panels or group performances needing more than two simultaneous mics.
Pros:
- Two handheld mics suit paired speakers or performers
- 100 selectable frequencies per channel with auto scan
- Lock function helps preserve chosen settings
- Replaceable microphone heads and metal receiver construction
Cons:
- Only two channels, unlike the four-mic alternatives
- Product details list a 1/4-inch receiver output rather than individual XLR outputs
- Stated maximum range is a line-of-sight figure
Best for: Duets, small karaoke setups, presentations and worship teams that need two handhelds with selectable frequencies.
Not ideal for: Groups needing three or four simultaneous microphones, or mixers that require individual XLR feeds from each channel.
Bottom line: We’d choose the PTU-71-2H when two microphones are enough and selectable frequencies matter more than four-channel capacity.
“We’d choose the PTU-71-2H when two microphones are enough and selectable frequencies matter more than four-channel capacity.”
Phenyx Pro 4-Ch UHF Fixed Frequency Wireless Microphone System PTU-5000-4H
The PTU-5000-4H is the straightforward four-mic option for a home, small venue or event setup where the receiver can stay in one place. Its four channels use fixed frequencies, so there is no auto scan routine to run. The receiver remembers its last settings, and its LCD shows frequency; those features can make repeat setup simple when the surrounding RF environment is predictable. Compared with the PTU-7000-4H, however, it gives up selectable frequencies and auto scan. If a channel encounters interference, the listed system offers less room to adapt.All four handhelds have dynamic cardioid cartridges, and individual volume controls help balance speakers at the receiver. Four XLR outputs support separate channel connections to a mixer, while a 1/4-inch cable is also included. The all-metal receiver and snap-on BNC antennas suit regular setup and teardown, though the stated maximum range is 260 feet line of sight, shorter than the 328-foot figures listed for the other two systems. Its fixed-frequency design also means buyers should confirm that the four listed frequencies will work in their venue. We see it as a practical choice for stable installations and recurring group events, but a weaker fit for users who move between venues or need to adjust frequency plans.
Pros:
- Four handheld microphones and four receiver channels
- Individual channel volume controls and frequency display
- Four XLR outputs plus a 1/4-inch connection
- Memory switch retains the last settings
Cons:
- Four frequencies are fixed rather than selectable
- Listed line-of-sight range is shorter than the other two systems
- Product details state up to 8 hours of battery operation
Best for: Fixed home or venue setups that need four handheld mics, individual volume controls and separate XLR outputs.
Not ideal for: Mobile event operators who need to scan for cleaner frequencies or change channel assignments as venue conditions shift.
Bottom line: We’d pick the PTU-5000-4H for a repeatable four-mic setup where fixed frequencies are suitable and simple recall matters.
“We’d pick the PTU-5000-4H for a repeatable four-mic setup where fixed frequencies are suitable and simple recall matters.”
As an Amazon Associate we earn from qualifying purchases.
Before You Start
Set up the system at the venue where it will operate. Wireless reception depends on walls, people, other radio devices, and the distance between transmitter and receiver. Keep the receiver visible and away from metal enclosures, Wi-Fi access points, and other wireless receivers when possible. Turn down the mixer channel and speaker level before connecting equipment to prevent a loud pop.
Step-by-Step Instructions
Step 1: Inspect and power the equipment
Place the receiver on a stable surface with its front panel visible. Attach its antennas according to the manual, then connect its power supply. Install fresh batteries in the microphone or bodypack, following the polarity marks, and leave the transmitter switched off while you connect the audio cable.
Tip:Do not mix old and new batteries. If the system uses rechargeable batteries, begin with a full charge.
Check: The receiver powers on without an error indicator, and the transmitter battery indicator shows adequate charge.
Step 2: Connect the receiver to the sound system
Run an audio cable from the receiver output to a suitable mixer input. Use the receiver’s balanced XLR output for a microphone input when available; use a quarter-inch output only with an input suited to its level. If connecting directly to a powered speaker, use an input labeled for line or microphone level as appropriate to the receiver output. Keep the mixer channel and master level low.
Tip:Do not connect a receiver output to a speaker output. Both are outputs, and that connection can damage equipment.
Check: The cable is seated at both ends, and the selected mixer or speaker input is identified and ready.
Step 3: Choose and synchronize a clear channel
Turn on the receiver and use its scan function if available to find an open channel in the venue. Follow the manual to set the same group and channel on the transmitter, or use the system’s infrared or automatic sync function. If you have multiple wireless microphones, use compatible channels from the system’s coordinated group rather than choosing each frequency independently.
Tip:Run the scan with other wireless systems that will be used at the event switched on. Nearby systems can affect which channels are usable.
Check: The receiver and transmitter display the same group, channel, or frequency, and the receiver shows a radio-frequency signal when the transmitter is switched on.
Step 4: Set the transmitter and receiver levels
Clip a bodypack microphone securely and position its capsule as directed by the manufacturer, or hold a handheld microphone by its handle. Switch on the transmitter and set its input sensitivity or gain as instructed in the manual. Speak or sing at the expected performance volume while watching the receiver’s audio meter; adjust transmitter gain so normal peaks register without reaching the clip indicator.
Tip:Keep the microphone away from speakers while setting levels. Feedback can occur even during a brief test.
Check: The receiver audio meter responds to your voice, with no clipping indicator during normal loud speech.
Step 5: Set the mixer input and output
Unmute the mixer channel and ask someone to speak at the expected distance and volume. Raise the channel gain until the mixer meter shows a healthy signal without clipping, then raise the channel fader and master level gradually to the required listening level. If the sound is distorted, lower the transmitter or receiver output before adding more mixer gain.
Tip:Use the receiver output control, if provided, to match the level expected by the mixer input. Avoid compensating for a very low receiver output by pushing every later control to its maximum.
Check: Speech is audible at a comfortable level, and neither the receiver nor mixer shows clipping.
Step 6: Walk-test the microphone
Walk through the full area where the microphone will be used while speaking continuously. Include the stage edges, lectern, and any places behind people or near walls. Watch the receiver’s radio-frequency and audio indicators and listen for dropouts, hiss, or sudden changes in volume.
Tip:Keep the transmitter antenna unobstructed and avoid gripping it. A bodypack antenna should hang freely rather than being folded or covered by a metal object.
Check: The receiver maintains a stable signal and the sound remains clear throughout the intended coverage area.
Step 7: Secure the setup for use
Mute the channel while you route and secure cables, then restore the tested settings. Place the receiver where it will remain in view, keep its antennas in the tested position, and mark or note the channel used. Tell the microphone user how to mute and switch off the transmitter after use.
Tip:Keep a spare microphone or batteries available for longer events, and avoid changing channels after the test unless you repeat the walk test.
Check: The system is connected, its channel is recorded, cables are out of walking paths, and the user can operate the microphone without changing the setup.
Common Mistakes to Avoid
- Setting the transmitter and receiver to different channels. — Use the sync function or verify that the displayed group and channel match at both ends before testing audio.
- Turning up the mixer to compensate for a clipped transmitter signal. — Check the receiver meter first and reduce transmitter input gain if it clips; then set mixer gain from a clean signal.
- Placing the receiver behind a rack, wall, or other obstruction. — Keep it visible and repeat the walk test from all areas where the microphone will be used.
- Selecting an unapproved or incompatible frequency. — Use the frequency range approved for the system’s region and follow the manufacturer’s channel coordination guidance.
Troubleshooting
Problem: The receiver shows no radio-frequency signal.
Solution: Check that the transmitter is powered on, has charged batteries, and is synchronized to the receiver’s channel. Move the receiver into view, reposition its antennas, and scan for another approved open channel if the signal remains absent.
Problem: The receiver shows signal, but there is no sound from the speaker.
Solution: Confirm that the receiver output is connected to the intended mixer input, the channel is unmuted, and the master output is up. Check the transmitter mute switch and speak into the microphone while watching the receiver audio meter.
Problem: Audio cuts out while walking.
Solution: Move the receiver closer or into a clear line of sight, keep the transmitter antenna unobstructed, and repeat the walk test. If dropouts continue, scan for a clear compatible channel and check for nearby wireless equipment.
Problem: Speech sounds distorted or clips.
Solution: Lower transmitter input gain if the receiver meter clips. If the receiver is clean, reduce its output or mixer input gain and set levels again while speaking at normal event volume.
What Success Looks Like
The transmitter and receiver share a compatible channel, the receiver is connected to the correct sound-system input, and speech is clear at the required volume. Receiver and mixer meters respond without clipping, and a walk test across the intended area produces no dropouts.
Next Steps
Before the event, check battery status and repeat a short sound check in the final room layout. After use, mute the mixer, switch off the transmitter and receiver, disconnect cables by their connectors, and remove disposable batteries if the system will be stored for an extended period. Record the working channel and any coverage limitations for the next setup.
Frequently Asked Questions
Can I use two wireless microphones at the same time?
Yes, if the system supports multiple transmitters and their channels are coordinated. Select compatible channels from the manufacturer’s group plan, then test both microphones together because a channel that works alone may conflict when another transmitter is active.
Should I connect the receiver to a microphone or line input?
Follow the receiver’s output specification and the mixer input labels. A balanced XLR receiver output commonly connects to a microphone input, while some quarter-inch outputs provide line level. If the sound clips at a low mixer gain setting, reduce the receiver output or use a suitable line input.
How far can I move from the receiver?
The usable distance depends on the model, antenna placement, venue construction, and interference. Use the manufacturer’s range as a guide, then walk-test the actual room and stay within the area where the signal remains stable.
Why does the microphone hiss or hum?
Hiss can come from excessive gain or a weak radio signal; hum can come from cabling or electrical interference. Check receiver signal strength, lower excessive gain, reseat the audio cable, and move the receiver away from power supplies and other electronics.