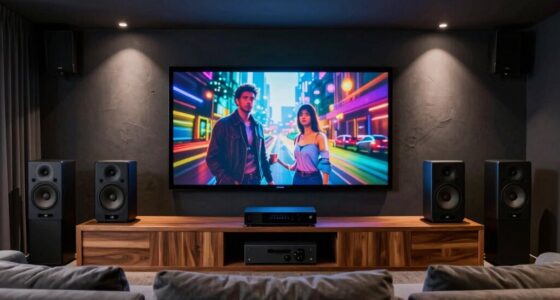
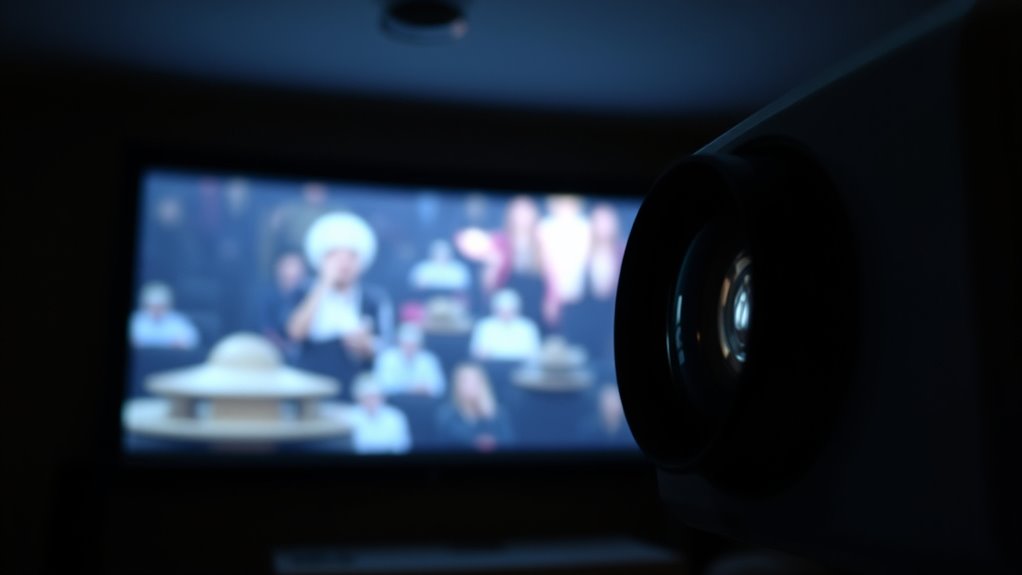
If your projector image looks blurry, it could be a focus or alignment issue. First, check if the focus ring or digital focus setting needs modifying to sharpen the image. If the picture is distorted or skewed, it’s likely a misalignment problem. Properly aligning the projector ensures a clear, rectangular picture, while focusing fine-tunes sharpness. Understanding these differences helps you troubleshoot effectively, so keep exploring to learn how to get the best picture quality.
Key Takeaways
- Check if the focus ring or motorized focus is properly adjusted for sharpness.
- Ensure the projector is correctly aligned and level to prevent skewed or distorted images.
- Determine if blurriness is uniform (focus issue) or irregular (alignment problem).
- Clean the lens and focus mechanism regularly to avoid dust causing blurry images.
- Reposition the projector if the image shape is distorted before fine-tuning focus.
![[Officially-Licensed App & Auto Focus]White Smart Mini Projector with WiFi and Bluetooth, XuanPad 4K Support Movie Projector, Portable Native 1080P Outdoor Projector with 360° Stand](https://m.media-amazon.com/images/I/51I8uy-U8bL._SL500_.jpg)
[Officially-Licensed App & Auto Focus]White Smart Mini Projector with WiFi and Bluetooth, XuanPad 4K Support Movie Projector, Portable Native 1080P Outdoor Projector with 360° Stand
Exciting Moments Begin – The XuanPad mini projector compatible with Netflix for the ultimate viewing experience.No extra devices…
As an affiliate, we earn on qualifying purchases.
As an affiliate, we earn on qualifying purchases.
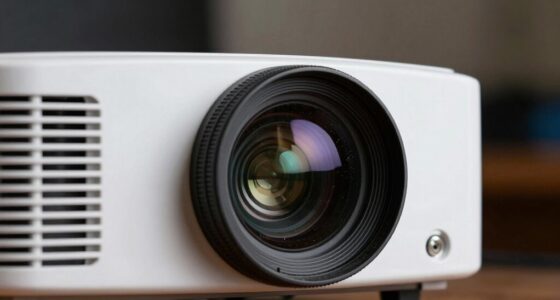
Understanding the Focusing Mechanism of Your Projector

Understanding how your projector’s focusing mechanism works is essential for achieving a sharp and clear image. Most projectors use a manual focus ring or a motorized focus system. When you turn the focus ring or activate the focus control, you adjust the distance between the lens and the image sensor, which changes the focus point. This adjustment aligns the light rays so they converge precisely on the screen. If you’re using a manual focus, rotate the ring slowly until the image sharpens. For motorized focus, use the remote or menu controls to fine-tune the focus. Remember, small adjustments can make a big difference, so take your time to find the best focus point for the clearest picture. Additionally, European cloud innovation emphasizes the importance of reliable hardware, which can help maintain optimal focus performance over time. Proper maintenance and calibration of your projector’s lens and focus system are also key to preventing blurry images and ensuring consistent image sharpness.

MOVHEIYL Replacement Remote Control for WiMiUS P64,for DBPOWER H89 Electric Focus Mini Projector, for YABER E1 Electric Focus Mini Projector
Compatible with WiMiUS P64,for DBPOWER H89 Electric Focus Mini Projector, for YABER E1 Electric Focus Mini Projector
As an affiliate, we earn on qualifying purchases.
As an affiliate, we earn on qualifying purchases.
Common Causes of Blurry Images Due to Focus Issues

Blurry images often result from common focus issues that can be surprisingly straightforward to identify and fix. One main cause is improper adjustment of the focus ring, which can easily be overlooked. Proper focus adjustment ensures sharpness and clarity in your projection. Another is using the wrong focus mode for your environment, such as auto-focus struggling in low light or with certain surfaces. Additionally, dirt or dust on the lens or projector’s focus mechanism can prevent a sharp image. To avoid these problems, double-check your focus setting, switch modes if needed, and clean the lens regularly. Regular maintenance and adjustments can go a long way in achieving a crisp, clear picture. Additionally, being aware of outdoor conditions can help you choose the best focus mode for your environment. Using the right filter can also protect the lens and keep your projector functioning optimally. Incorporating exposure settings adjustments can further enhance image clarity in varying lighting conditions.

Aispour Camera Lens Cleaning Kit, 10-in-1 Camera Cleaning Kit, Camera Lens Cleaner and Camera Accessories, Includes Lens Cleaning Kit/Lens Cleaner/Lens Cleaning Pen/Soft Brush
WHAT YOU CAN GET: 1 camera lens Cleaner 50ml + 1 air blower + 1 two in one…
As an affiliate, we earn on qualifying purchases.
As an affiliate, we earn on qualifying purchases.
How to Properly Align Your Projector for a Clear Picture

Proper alignment is key to achieving a sharp, clear picture with your projector. Begin by positioning the projector so it’s centered directly in front of the screen, avoiding skewed angles. Use a level to guarantee the projector is even horizontally and vertically. Adjust the height so the lens is at or slightly below the top edge of the screen for ideal image shape. Once in position, gently tilt the projector until the image fills the screen evenly, with no keystone distortion. Many projectors have built-in alignment tools or grid patterns; activate these features to fine-tune the image position. Take your time, making small adjustments until the image is rectangular, centered, and sharp across the entire screen. Proper alignment prevents blurry edges and ensures a crisp viewing experience. Additionally, proper setup and calibration can significantly improve image clarity and reduce the need for repeated adjustments. Understanding how projection geometry affects image shape can help you troubleshoot distortions more effectively. Being aware of lens shift features available on some projectors can also assist in achieving perfect alignment without distortion. Regularly checking the alignment can help maintain a clear picture over time, especially if the projector is moved or bumped. Moreover, ensuring that the installation environment is free from vibrations or movement can help preserve the alignment and picture quality.
Sewing Guide Light Green Cross Light Module Generator Projector Replacable USB for Heat up Screen Printing Placement Fabric Cloth Sewing Alignment
Application: Garment Production Fabric Alignment Sewing Machine Quilting, Pocket Opening Alignment, Heat Press Machine.
As an affiliate, we earn on qualifying purchases.
As an affiliate, we earn on qualifying purchases.
When to Adjust the Lens Versus Realigning the Projector
Sometimes, despite your best alignment efforts, the image still isn’t sharp or properly proportioned. Knowing whether to adjust the lens or realign the projector depends on the issue. If the image is blurry uniformly across the screen, you should try adjusting the lens for focus. However, if the image appears skewed, stretched, or misaligned, it’s time to reposition the projector.
Consider these points:
- Use the lens adjustment when the picture is sharp but slightly out of focus.
- Realign the projector if the image shape is distorted or not centered.
- Avoid repeatedly tweaking the lens if the projector isn’t properly aligned; fixing the setup first often yields better results.
Choosing the right approach ensures you get a clear, correctly proportioned image without unnecessary frustration or damage.
Tips for Maintaining Sharp and Clear Projector Images

To keep your projector images sharp and clear, regular maintenance and proper setup are essential. Start by cleaning the lens and air vents to prevent dust buildup, which can blur the image. Make certain the projector is positioned correctly—level and at the right distance from the screen—for ideal focus. Use the projector’s focus ring or digital focus adjustments to fine-tune clarity. Keep the projector in a stable, vibration-free location to avoid image shifts. Adjust the keystone and alignment settings to keep the image rectangular and centered. Regularly update the projector’s firmware and calibrate the color settings for consistent picture quality. Additionally, performing seasonal checklists for cleaning and maintenance can help prevent issues that degrade image sharpness over time. Ensuring that your projector’s optical components are properly maintained is crucial for consistent image quality. Properly aligning and calibrating your projector helps maintain optimal focus and image clarity over its lifespan. Also, paying attention to environmental conditions such as lighting and temperature can significantly impact image sharpness. Incorporating proper lighting control in your viewing area can further enhance image clarity. Finally, replace worn or damaged parts promptly to maintain sharpness and prevent image degradation over time.
Frequently Asked Questions
Can Environmental Factors Affect Projector Focus Quality?
Yes, environmental factors can affect your projector’s focus quality. Humidity, temperature, and dust can cause internal components to shift or become less effective, leading to blurry images. Also, uneven surfaces or vibrations can disturb the projector’s alignment or focus settings. To get the best image, make certain your environment is stable, clean, and within ideal temperature ranges. Regular maintenance and proper placement help maintain sharp, clear visuals.
How Does Projector Resolution Impact Image Clarity?
Ever notice how higher resolution projectors deliver sharper images? The clearer the resolution, the more detail you see, making text crisp and visuals vibrant. When resolution is low, images appear pixelated and blurry, no matter how well you adjust the focus. So, if you want a clear, professional display, choose a projector with a high resolution. It’s like upgrading from a blurry photo to a high-definition picture.
Are There Specific Projector Models More Prone to Focus Problems?
Yes, some projector models are more prone to focus problems, especially cheaper or older models with less precise lens adjustments. DLP projectors can sometimes have focus issues if the internal components shift or degrade over time. High-end projectors with advanced focus mechanisms tend to maintain sharp images better. To avoid problems, choose models known for reliable focus adjustments and regular maintenance to keep the image crisp.
What Is the Typical Lifespan of Projector Lenses?
They say “a picture is worth a thousand words,” and your projector lens typically lasts between 5 to 10 years with proper care. Factors like frequent use, dust, and handling can shorten its lifespan. Keep the lens clean and avoid rough handling to prolong its life. Regular maintenance ensures your projector continues to deliver crisp images, making your investment worthwhile over time.
How Do I Troubleshoot if the Focus Is Fine but the Image Remains Blurry?
If your focus seems fine but the image is still blurry, first check the lens for smudges or dirt and clean it gently with a microfiber cloth. Confirm the projector is properly aligned with the screen, not skewed or tilted. Adjust the keystone correction and zoom settings if available. Also, verify the input source resolution matches the projector’s native resolution. If issues persist, examine the lens assembly for damage or misalignment.
Conclusion
To keep your projector images sharp, regular maintenance is key. Did you know that improper focus or alignment can reduce picture clarity by up to 50%? By understanding your projector’s focusing mechanism and staying attentive to alignment, you can enjoy crisp, clear visuals every time. Don’t forget to periodically check and adjust your projector—it’s a simple step that makes a big difference in your viewing experience.