This guide helps streamers select and set up a studio microphone to enhance audio clarity and professionalism. It covers choosing the right microphone, connecting it correctly, and optimizing settings for streaming. Suitable for users with basic computer knowledge looking to upgrade their audio setup.

Get audio and creator gear delivered free with Prime
- Fast, free delivery on millions of items
- Prime Video, Amazon Music and more included
- Member-only deals all year

Logitech Blue Yeti USB Microphone for PC, Mac, Gaming, Recording, Streaming, Podcasting, Studio, and Computer – Blackout
- ✔ Microphone Type: Condenser
- ✔ Pickup Patterns: Cardioid, Omni, Bidirectional, Stereo
- ✔ Connectivity: USB

FIFINE AmpliGame AM8 USB/XLR Dynamic Microphone for Gaming and Streaming
- ✔ Frequency Response: 50Hz-16KHz
- ✔ Connection Types: USB, XLR
- ✔ RGB Lighting: Yes

FIFINE T669 Studio Condenser USB Microphone for Recording and Podcasting
- ✔ Connection: USB
- ✔ Type: Condenser
- ✔ Polar Pattern: Cardioid
Difficulty: Intermediate | Time: 1-2 hours
What You’ll Need
Tools & Materials:
- XLR or USB microphone
- Audio interface (if using XLR)
- Microphone stand
- Pop filter
- XLR or USB cable
- Computer with streaming software (e.g., OBS)
- Headphones
Knowledge:
- Basic computer operation
- Understanding of audio input devices
- Familiarity with streaming software
Confirm your computer’s compatibility with the microphone type. Prepare a quiet environment to test your setup effectively.
Logitech Blue Yeti USB Microphone for PC, Mac, Gaming, Recording, Streaming, Podcasting, Studio, and Computer – Blackout
<p>The <strong>Blue Yeti</strong> stands out for its <em>multiple pickup patterns</em> that adapt seamlessly to different streaming scenarios, from solo podcasts to group discussions. Its <em>plug-and-play USB connection</em> allows quick setup on both Mac and PC, making it ideal for streamers who want professional sound without complex wiring. The onboard controls, including gain and mute, give quick access during live sessions, while the <em>Blue VO!CE effects</em> enhance voice clarity and presence. Compared with the FIFINE T669, it offers more overall versatility but at the cost of a larger footprint and less mobility, as it requires a dedicated desk space.</p>
Pros:
- High broadcast-quality sound with multiple pickup patterns
- Easy to set up and use with onboard controls
- Versatile for different recording environments
- Blue VO!CE effects for enhanced voice clarity
Cons:
- Bulkier design takes up desk space
- USB-only connection limits mobility
- Higher price point compared to basic mics
Best for: Streamers who want a high-quality, all-in-one microphone with multiple pattern options and easy setup.
Not ideal for: Users with limited desk space or those seeking a portable solution for on-the-go streaming.
Bottom line: The Blue Yeti is the best all-around choice for streamers seeking flexibility, quality, and ease of use in a single package.
“The Blue Yeti is the best all-around choice for streamers seeking flexibility, quality, and ease of use in a single package.”
FIFINE AmpliGame AM8 USB/XLR Dynamic Microphone for Gaming and Streaming
<p>The <strong>FIFINE AmpliGame AM8</strong> offers a compelling combination of <em>USB and XLR connectivity</em>, making it suitable for streamers who want flexibility and future expansion. Its <em>built-in mute button and RGB lighting</em> add convenience and aesthetic appeal, especially in gaming setups. The microphone’s <em>noise-canceling windscreen</em> helps produce clearer audio in noisy environments. However, when used in XLR mode, some features like RGB lighting become inactive, and the lack of an included XLR cable can be a drawback for those wanting a quick setup. Compared to the Blue Yeti, it’s more versatile in connectivity but less straightforward for plug-and-play simplicity.</p>
Pros:
- Dual USB and XLR connectivity for flexibility
- Built-in mute button with LED indicator
- RGB lighting for personalization
- Includes noise-canceling windscreen
Cons:
- RGB lighting and controls inactive in XLR mode
- XLR cable not included
- Some features only available via USB
Best for: Gamers and streamers seeking both USB ease and XLR upgrade potential, with customizable aesthetics.
Not ideal for: Users who prefer a dedicated USB microphone without XLR complexity or those not interested in gaming features.
Bottom line: The FIFINE AmpliGame AM8 offers excellent flexibility and gaming-oriented features, making it ideal for versatile streamers who want future-proofing.
“The FIFINE AmpliGame AM8 offers excellent flexibility and gaming-oriented features, making it ideal for versatile streamers who want future-proofing.”
FIFINE T669 Studio Condenser USB Microphone for Recording and Podcasting
<p>The <strong>FIFINE T669</strong> is designed for those prioritizing <em>high-quality voice capture</em> with a straightforward USB connection. Its <em>cardioid polar pattern</em> helps reduce ambient noise, making it suitable for podcasting and streaming in quieter environments. Included accessories like a <em>boom arm, pop filter, and shock mount</em> simplify setup and improve sound quality. While it offers excellent audio clarity, its <em>incompatibility with Xbox</em> and potential for ambient noise pickup require proper placement and environment control. Compared with the Blue Yeti, it’s more accessory-rich but less versatile in pickup pattern options.</p>
Pros:
- High-quality, clear voice reproduction
- Includes accessories for optimal setup
- Easy to use with USB plug-and-play
- Durable, sturdy build
Cons:
- Not compatible with Xbox or consoles without PC connection
- Potential ambient noise pickup if not positioned properly
- Limited to cardioid polar pattern
Best for: Podcasters and streamers wanting high-quality, professional voice recordings with easy setup.
Not ideal for: Gamers or multi-pattern users who need more recording versatility or console compatibility.
Bottom line: The FIFINE T669 is a strong choice for content creators focused on voice clarity and professional sound quality in a simple setup.
“The FIFINE T669 is a strong choice for content creators focused on voice clarity and professional sound quality in a simple setup.”
As an Amazon Associate we earn from qualifying purchases.
Before You Start
Ensure your workspace is free of excessive noise and that your computer drivers are up to date. Decide whether you’ll use a USB or XLR microphone, as this affects setup steps and equipment needed.
Step-by-Step Instructions
Step 1: Identify the microphone type matching your setup
Determine if you will use a USB microphone, which connects directly to your computer, or an XLR microphone, which requires an audio interface. This choice affects the setup process and equipment needed.
Tip: USB microphones are simpler to set up and ideal for beginners, while XLR microphones offer higher audio quality and flexibility for advanced users.
Check: You know the correct microphone type based on your equipment and have it ready for connection.
Step 2: Position your microphone correctly
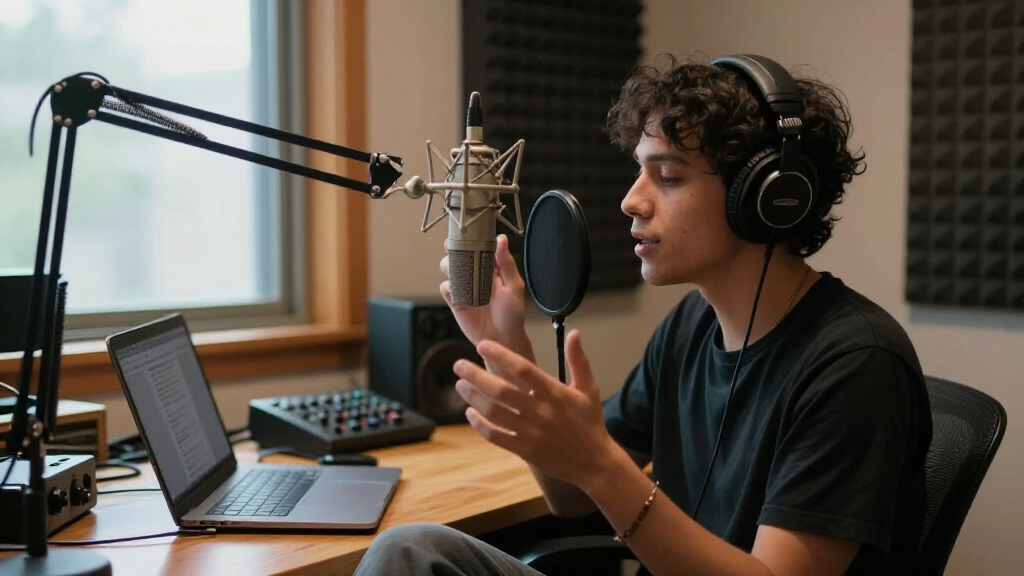
Place the microphone on a stable stand at a distance of about 6-12 inches from your mouth. Adjust the angle so it points directly at your mouth, slightly below or above to avoid plosives.
Tip: Use a pop filter between your mouth and the microphone to reduce popping sounds from speech consonants.
Check: Microphone is in a stable, optimal position, with no vibrations or movement during use.
Step 3: Connect the microphone to your computer
If using a USB microphone, plug it directly into a USB port. If using an XLR microphone, connect it to an audio interface with an XLR cable, then connect the interface to your computer via USB or Thunderbolt.
Tip: Use a dedicated port; avoid sharing ports with other high-power devices to prevent noise.
Check: Your computer recognizes the microphone device without errors, confirmed via sound settings.
Step 4: Configure your computer’s sound settings
Access your system’s sound settings. Set your microphone as the default input device. Adjust the input volume to a level where your voice is clear but not clipping.
Tip: Test the microphone by speaking into it and observing the input level indicator. Avoid setting the volume too high, which causes distortion.
Check: Input levels are active and stable when speaking, with no distortion or dropouts.
Step 5: Configure microphone in streaming software
Open your streaming software (e.g., OBS). Go to Settings > Audio. Select your microphone device as the primary audio input source. Adjust the gain or volume slider if available.
Tip: Test your audio in the software’s preview mode. Use headphones to monitor real-time sound and detect issues.
Check: Your voice is clearly audible in the preview, with no background noise or distortion.
Step 6: Optimize microphone settings for streaming
Use a noise gate to eliminate background sounds during silence. Enable a compressor to level out volume variations. Adjust EQ settings if your software supports it, emphasizing clarity.
Tip: Apply filters gradually, testing each to find a natural sound. Avoid excessive processing that can cause artifacts.
Check: Your voice sounds consistent and professional, with minimal background noise when speaking normally.
Common Mistakes to Avoid
- Placing the microphone too close or too far from the mouth — Position the microphone about 6-12 inches from your mouth, slightly below or above, to balance clarity and reduce plosives.
- Using incorrect gain levels, causing distortion or low volume — Test and adjust input gain so your voice peaks around 75% of the meter without clipping.
- Neglecting room acoustics, leading to echo or background noise — Set up in a quiet room with soft furnishings or sound panels to absorb echoes.
Troubleshooting
Problem: Microphone not recognized by the computer
Solution: Check all connections, switch to a different USB port, and verify driver installation or default device settings.
Problem: Audio sounds distorted or muffled
Solution: Reduce input gain, check physical placement, and remove any obstructions or sources of interference.
Problem: Background noise is too loud during streaming
Solution: Use noise suppression filters and position the microphone away from noisy equipment or open windows.
What Success Looks Like
The microphone captures clear, natural voice recordings with minimal background noise. The audio levels are balanced, and the sound is free of distortion or static when monitored through headphones and during streaming.
Next Steps
Regularly test your microphone setup before streams. Update your audio filters and settings based on environment changes. Consider investing in better acoustic treatment or a higher-quality microphone as your needs grow.
Frequently Asked Questions
Can I use a USB microphone for professional streaming?
Yes, many USB microphones provide excellent sound quality suitable for streaming, especially for beginners. For higher production quality, XLR microphones with an audio interface are recommended.
How do I reduce background noise during streaming?
Use a quiet environment, apply noise suppression filters in your streaming software, and position your microphone carefully away from noise sources.
Should I use a pop filter or shock mount?
Yes, a pop filter helps reduce plosive sounds, and a shock mount minimizes vibrations and handling noise, improving overall audio quality.
How often should I test my microphone setup?
Test your microphone before each streaming session to ensure levels are correct and there is no background noise or interference.
Halloween Picks
halloween
As an affiliate, we earn on qualifying purchases.