
If your award-season movie feels too dark and shadows are crushed, start by selectively lifting shadows with curve or lift controls instead of over-brightening the entire scene. Adjust color balance slightly to add warmth or coolness, which can help bring out details and improve mood. Be careful not to overdo it, as unnatural looks can hurt the scene’s impact. Keep experimenting with these techniques to find that perfect balance—there’s more to discover for a striking, clear image.
Key Takeaways
- Use selective shadow lifting with curves or lift controls to recover detail without brightening the entire scene.
- Apply subtle color grading adjustments, like warming tones, to counteract excessive darkness and enhance mood.
- Avoid global brightness increases; focus on refining specific dark areas to maintain depth and natural look.
- Incorporate contrast and saturation tweaks to restore visual clarity while preserving the gritty atmosphere.
- Balance shadow recovery with storytelling by ensuring emotional and narrative clarity without sacrificing the film’s tone.
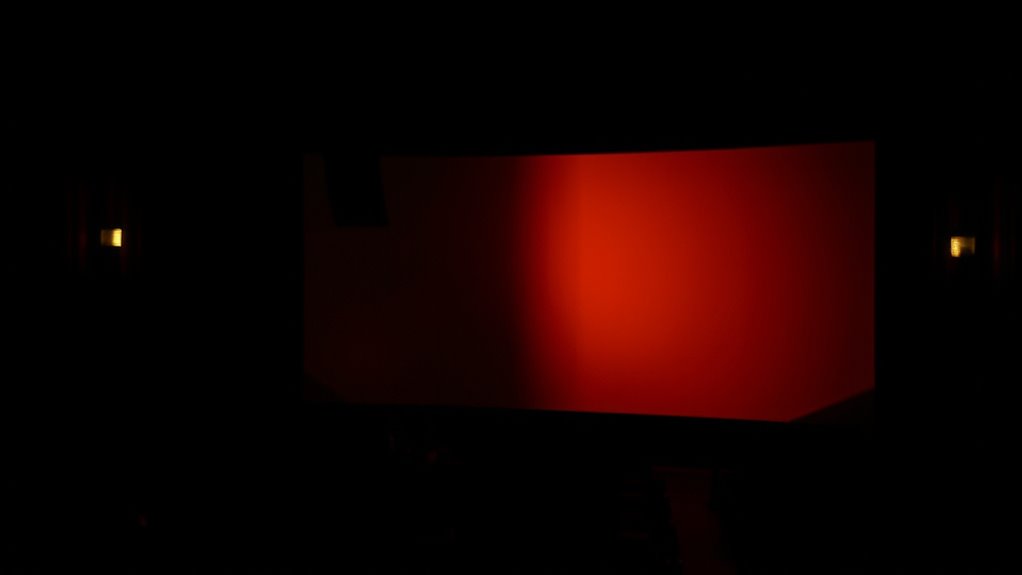
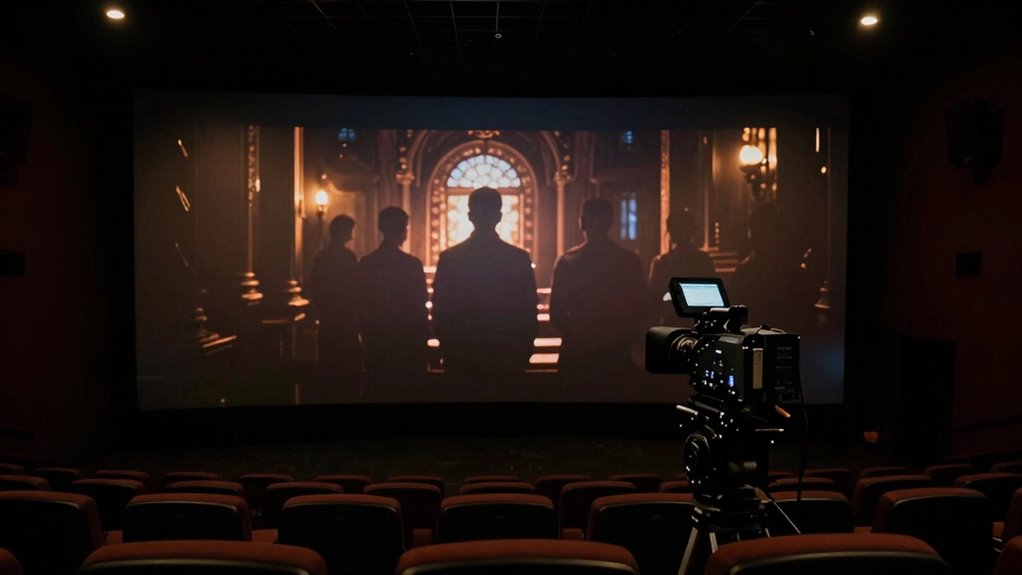
As award-season movies grow increasingly dark and gritty, many viewers find themselves questioning whether these somber tones serve the story or simply overshadow it. When shadows become too crushed, details fade into obscurity, making scenes look flat and unengaging. This is where understanding color grading becomes essential. Proper color grading isn’t just about making a film look visually appealing; it’s about shaping the mood and guiding the audience’s emotional response. If shadows are overly crushed, the film’s atmosphere can feel oppressive or monotonous, diluting the impact of key moments. To fix this, you need to carefully adjust the shadow regions during post-production, restoring detail without sacrificing the intended mood.
Crushed shadows can obscure detail and flatten scenes, but thoughtful color grading restores depth without sacrificing mood.
You don’t have to over-brighten the entire image to bring back lost detail. Instead, focus on selectively lifting shadows using tools like curves or lift controls in your editing software. This allows you to reveal hidden details in dark areas while maintaining the overall tone. You want to enhance the mood without sacrificing the visual depth or creating a washed-out appearance. When done correctly, this process enriches the storytelling, making scenes more nuanced and emotionally resonant. It’s a delicate balance—too much lifting can make a scene look unnatural, while too little can keep it feeling bleak and unrevealing.
Color grading plays a fundamental role here, enabling you to fine-tune the overall look. By subtly shifting the color balance, you can add warmth or coolness to counteract overly dark shadows. For instance, adding a slight warmth can soften the gloom, making scenes feel more inviting despite their darkness. Conversely, a cooler tone might emphasize tension or mystery. These adjustments work together to boost mood enhancement, ensuring the film’s emotional core remains intact. You want viewers to feel immersed, not exhausted by the visual darkness. Additionally, understanding color grading techniques can help you balance contrast and saturation for a more polished final image.
Ultimately, the goal is to make sure that the story’s emotional beats come through clearly, even amid a dark palette. You don’t need to compromise the gritty aesthetic; instead, you should refine it to preserve detail and mood. By mastering shadow recovery and thoughtful color grading, you can fix crushed shadows without over-brightening, maintaining the integrity of the film’s tone and enhancing storytelling. This approach keeps award-season movies compelling and visually striking, ensuring darkness serves the narrative—not hinders it.
Calibrite ColorChecker Passport Photo 2 Portable Color Calibration Kit for Photo and Video, 4 Target Set for White Balance, Exposure and Camera Profiling, Protective Folding Case with Lanyard (CCPP2)
SPECIFICATIONS: Portable ColorChecker Passport kit with 4 targets for exposure control, custom white balance, camera profiling, and enhancement…
As an affiliate, we earn on qualifying purchases.
As an affiliate, we earn on qualifying purchases.
Frequently Asked Questions
How Can I Identify if My Movie Is Too Dark?
You can tell if your movie is too dark by performing shadow detection and exposure analysis. Look for details lost in deep shadows or areas that appear overly crushed, indicating insufficient lighting. Use software tools to analyze the image’s histogram and shadow levels. If shadows lack detail or the image seems uniformly dark, it’s a sign to adjust your exposure. Proper analysis helps preserve detail without over-brightening, maintaining a natural look.
Are There Specific Tools for Adjusting Shadows Without Affecting Highlights?
Think of shadow masking as your movie’s gentle hand, selectively lifting dark areas without disturbing the shining highlights. You can use tools like DaVinci Resolve’s color wheels or Lumetri’s shadow sliders, which allow precise shadow adjustments while maintaining highlights. These tools act like a skilled painter, balancing depth and brightness. By focusing on shadow masking techniques, you ensure your scene retains its emotional depth without over-brightening, creating a natural, cinematic look.
Will Fixing Shadows Compromise the Overall Color Grading?
Fixing shadows won’t necessarily compromise overall color grading if you use targeted tools like curves or shadow-specific adjustments. You maintain shadow detail and preserve color accuracy by tweaking only the dark areas, avoiding over-brightening highlights. Be precise with your edits, and you’ll enhance shadow detail without sacrificing the film’s intended color palette. This way, your picture stays balanced, vibrant, and true to the original aesthetic.
What Are Common Mistakes When Brightening Shadow Areas?
When brightening shadow areas, beware of blurring boundaries and losing detail. Common mistakes include overdoing contrast enhancement, which can create harsh edges, and applying uneven adjustments that wash out subtle shadow detail. You might also inadvertently introduce noise or flatten the image’s depth. To avoid these pitfalls, make precise, gradual adjustments, maintaining natural shadow detail while balancing contrast for a polished, professional look.
How Do Professional Colorists Handle Overly Dark Award Movies?
When handling overly dark award movies, you focus on refining your grading workflow by carefully balancing shadows to reveal detail without over-brightening. You use targeted adjustments, like lift and gamma, to restore depth. Throughout the process, you incorporate client feedback, ensuring their vision is met. This approach helps you fix crushed shadows seamlessly, maintaining the film’s mood while avoiding unnatural brightness or loss of contrast.

VEVOR Motorcycle Lift, 1100 LBS Motorcycle Lift ATV Scissor Lift Jack with Dolly & Hand Crank, Center Hoist Crank Stand with Wide Deck & Tool Tray for Street Bikes, Cruiser Bikes, Touring Motorcycles
Large Weight-bearing Capacity: When you need to lift your motorcycle for maintenance and cleaning, you can partner with…
As an affiliate, we earn on qualifying purchases.
As an affiliate, we earn on qualifying purchases.
Conclusion
Don’t let those award-season masterpieces drown in darkness! With a few simple tweaks, you can banish crushed shadows and reveal every stunning detail hiding in the shadows. Imagine finally experiencing every emotional nuance, every subtle expression, without straining your eyes—it’s like opening a secret world just beneath the surface. Don’t settle for a dim, muddy viewing experience. Brighten those shadows and let the true brilliance of these films shine through, brighter than ever before!
![WavePad Audio Editing Software - Professional Audio and Music Editor for Anyone [Download]](https://m.media-amazon.com/images/I/B1fcLEGCs6S._SL500_.png)
WavePad Audio Editing Software – Professional Audio and Music Editor for Anyone [Download]
Full-featured professional audio and music editor that lets you record and edit music, voice and other audio recordings
As an affiliate, we earn on qualifying purchases.
As an affiliate, we earn on qualifying purchases.
Calibrite ColorChecker Passport Photo 2 Portable Color Calibration Kit for Photo and Video, 4 Target Set for White Balance, Exposure and Camera Profiling, Protective Folding Case with Lanyard (CCPP2)
SPECIFICATIONS: Portable ColorChecker Passport kit with 4 targets for exposure control, custom white balance, camera profiling, and enhancement…
As an affiliate, we earn on qualifying purchases.
As an affiliate, we earn on qualifying purchases.