
TL;DR
Studio microphones for streaming work best when you match the connection and microphone type to your setup, then place the mic close to your mouth and manage room noise. USB is usually simpler, while XLR offers more routing options with extra gear; neither connection guarantees better sound. Start with placement, gain, and headphone monitoring before adding processing.
A new microphone can make your stream sound clearer, but it cannot turn a bare bedroom into a recording studio. A keyboard clacks, a fan hums, and your voice bounces off the walls; those details can reach your audience even through an expensive mic.

Get audio and creator gear delivered free with Prime
- Fast, free delivery on millions of items
- Prime Video, Amazon Music and more included
- Member-only deals all year
This guide helps you choose studio microphones for streaming based on your room and workflow. You’ll learn what USB and XLR actually change, when a dynamic or condenser mic makes sense, and how placement, gain, and monitoring can make a bigger difference than another feature on the box.
You’ll also get a practical setup sequence you can try before your next stream. Think of the microphone as a camera: its specs matter, but where you point it shapes what everyone hears.
Pick USB for a simpler computer setup; choose XLR if you want interface-based routing and control.
A dynamic mic can be practical in an untreated room, but it can still capture nearby noise.
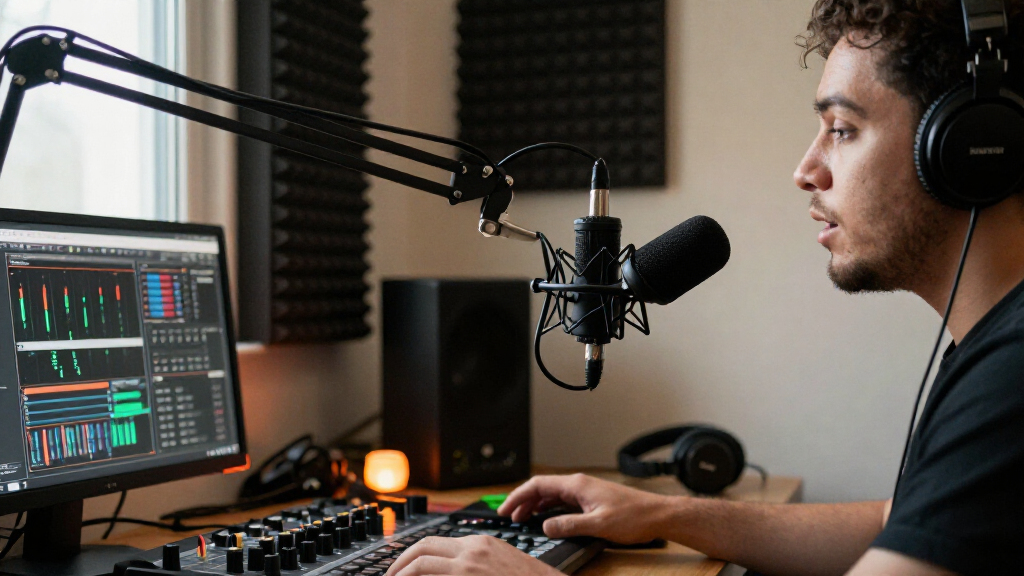
Start around 10–20 cm (4–8 inches) from your mouth and adjust the distance and angle while listening.
Use soft furnishings and mic placement to reduce room reflections before relying on aggressive noise processing.
Check gain with both normal speech and your loudest words, then monitor through headphones for problems.
Choose USB for a simple setup or XLR for more control
Studio microphones for streaming connect through USB or XLR, and the right choice depends on how much equipment and flexibility you want. A USB mic plugs directly into your computer and typically handles audio conversion inside the microphone. An XLR mic connects to an audio interface or mixer, which adds a separate step and more controls.
If you stream from a laptop and want fewer cables, USB is often the easy start. You can plug it in, select it in your streaming software, and monitor through headphones if the mic supports that. Imagine setting up five minutes before a game night: fewer pieces of gear mean fewer chances to select the wrong input.
XLR fits better if you already own an interface, want to route several audio sources, or expect to upgrade your setup over time. It usually costs more to get started because the microphone needs compatible preamp equipment. Some XLR condensers also require 48 V phantom power; check the mic and interface specifications before connecting them.
Neither connector determines sound quality by itself. Think of USB and XLR as two routes to your computer: what you hear still depends on the mic design, your voice, placement, room, and gain. Many recent creator mics offer both connections, plus mute buttons or headphone monitoring. Those features can make streaming easier, but they do not automatically improve the recorded sound.
Products Worth Considering

LG UltraGear 27-inch QHD OLED Gaming Monitor, 240Hz, 0.03ms, G-SYNC Compatible, FreeSync Premium Pro, HDMI 2.1, DisplayPort 1.4, Black

LG UltraGear 32-inch Curved QHD Gaming Monitor (2560×1440, 180Hz, 1ms, 1000R, HDR10)
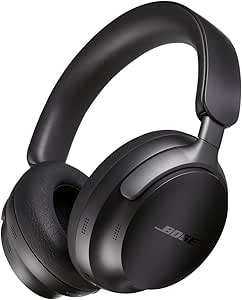
Bose QuietComfort Ultra Wireless Over-Ear Headphones with Spatial Audio and Noise Cancellation, Black
As an affiliate, we earn on qualifying purchases.
Match dynamic or condenser to the room you have
A dynamic microphone often suits a room with some fan or keyboard noise, while a condenser can capture a detailed voice in a quieter, controlled space. These are useful tendencies, not guarantees: microphone design and distance matter too. A dynamic mic does not become deaf to nearby sounds, and a condenser does not automatically make every voice sound better.
| Mic type | Often suits | What to watch |
|---|---|---|
| Dynamic | A speaker who can stay close in an untreated room | It can still pick up nearby noise and room reflections |
| Condenser | A quiet room where detailed voice capture is useful | It may capture unwanted room sound; some XLR models need phantom power |
For example, if your gaming PC fan sits near the desk, a dynamic mic placed close to your mouth may give your voice more prominence than a distant setup. But moving the mic away and turning up its gain can bring that same fan right back into the mix.
A condenser may be a good match for a quiet room where you can control reflections and background noise. A treated space can let its detail shine, while a reflective bedroom with bare walls may make the voice sound roomy. The best starting point is the room you actually use, not a product description recorded in a studio.
Use the pickup pattern to focus on your voice
A cardioid microphone favors sound from the front and reduces sensitivity toward the rear compared with the front. That makes it a practical pattern for one-person streaming when you can aim the mic toward yourself. It is a way to prioritize your voice, not a universal noise filter.
Omnidirectional mics capture sound from all directions, which can suit a group around a table but may also pick up more room sound. Figure-eight mics pick up from the front and back, so they can be useful for two people facing one another. Each pattern is like choosing a flashlight beam: it shapes what gets emphasis, but it cannot remove objects from the room.
Placement makes the pattern more useful. If your PC tower sits behind a cardioid mic, try turning the mic so its front points toward your mouth and its rear faces the computer, then listen to a test recording. On a desk where the keyboard sits close to the mic, a boom arm can help you reposition the capsule closer to your voice and farther from the keys.
The pattern label alone does not tell you how much noise you will hear. A nearby keyboard, a loud fan, or a reflective wall can still affect the recording. Sound quality depends on the whole setup: mic design, direction, distance, room, and how you speak.
Place your mic close enough for a clear, steady voice
A common starting point is to place your microphone about 10–20 cm (4–8 inches) from your mouth, then adjust for the mic and your speaking style. A closer mic can capture a fuller voice at a lower gain setting, which may help keep the room less prominent. Too close, though, and hard consonants or breath can burst against the capsule.
Start with this short setup sequence before you go live:
- Put the mic roughly 10–20 cm from your mouth, with its front aimed toward you.
- Angle it slightly off-axis so your breath does not hit the capsule head-on.
- Speak at normal volume and then say a few louder words; adjust gain so the loudest ones do not clip.
- Listen through headphones for plosives, room echo, hum, and keyboard noise.
- Move the mic or soften nearby reflections, then record another short sample.
For example, if your “p” sounds pop like a tiny drum hit, angle the mic slightly to one side or add a pop filter. A foam windscreen can also soften breath bursts. If desk bumps travel through the stand, a shock mount may reduce some of that vibration.
A boom arm can help you keep the mic in a consistent spot and move it away when you are not speaking. It cannot prevent the microphone from capturing every sound in its pickup range. Listen, adjust, and keep the position that sounds clear without forcing you to lean forward throughout a long stream.
Tame echo and desk noise before turning on heavy processing
A microphone cannot remove echo from a bare room, and software noise reduction cannot reliably undo every problem caused by distant placement. Rooms with hard floors, glass, and empty walls send your voice bouncing back into the mic. You can often hear it as a hollow tail after a sentence.
Try small room changes first. A rug under a hard floor, curtains over a window, or a bookcase near a reflective wall can soften some reflections. These materials do not replace dedicated acoustic treatment in a difficult room, but even a few soft surfaces may make the space less lively.
Suppose your stream sounds like you are speaking inside a kitchen. Moving a blanket or curtain near the wall behind your monitor may reduce some reflections, while moving the mic closer can help your voice stand out. A boom arm can also reduce desk-borne keyboard vibration when it moves the mic off the desk, though the keyboard may still be audible through the air.
Noise gates and suppression can help with steady sounds, but aggressive settings may chop off quiet words or make a voice sound watery. Test a short recording with the processing on and off. Keep it if the improvement is clear; if your voice develops strange gaps, address the source or placement first.
Set gain and monitoring so listeners hear clean speech
Set input gain so normal speech sounds strong while your loudest words stay below clipping. Clipping happens when the signal exceeds what the recording path can handle, and it can turn a shout into a harsh, distorted crackle. Exact meter targets vary by software and workflow, so judge the result with both the meter and your ears.
Say a few sentences at your usual volume, then add the excited shout you might use during a close match or a big reveal. If that shout distorts, lower the input gain and try again. Leave room for those peaks; a recording that is slightly quieter can be raised later, while clipped audio cannot be cleanly repaired.
Headphone monitoring lets you catch trouble before your audience does. Listen for a low electrical hum, a pop on “b” sounds, or the sharp click of a keyboard. If your mic has a mute button or a direct headphone output, those controls can make it easier to check your sound between scenes.
Digital settings such as sample rate and bit depth matter, but ordinary supported settings are usually enough for streaming. In practice, a clipped voice or a reflective bedroom is more likely to bother viewers than a mismatch between sensible standard settings. Check the microphone and streaming software specifications, select compatible settings, and spend your remaining time listening to a test.
Frequently Asked Questions
Should I buy a USB or XLR microphone for streaming?
USB is often the simpler choice because it connects directly to your computer. XLR usually needs an interface or mixer, but gives you more routing and upgrade options. Choose based on the equipment and workflow you want to manage.
Is a dynamic or condenser mic better for streaming?
A dynamic mic can work well when you can stay close in a room that is not acoustically treated. A condenser may suit a quieter, controlled room where detailed capture is useful. Neither type guarantees a good result if the placement and room are poor.
What microphone is best for a noisy room?
Consider a setup that lets you keep the mic close and speak consistently; a dynamic model may suit that approach. Reduce the noise source where you can, and test the mic position with headphones. A cardioid pattern can prioritize your voice from the front, but it does not erase nearby noise.
How close should my streaming microphone be?
About 10–20 cm (4–8 inches) is a useful starting range. Adjust for your microphone and voice, and try angling it slightly off-axis if breath or plosives sound harsh. Keep a consistent distance so your voice does not change level as you move.
Will a better microphone remove echo or background noise?
No microphone can remove room echo by itself. A mic may capture your voice clearly, but placement, reflective surfaces, and noise sources still shape the recording. Move closer, soften reflections with furnishings where practical, and use software processing as a supplement.
Conclusion
Start with the room and workflow you have: choose a connection you can use, place the mic close, and listen to a test through headphones. Those habits can make a bigger difference than adding another feature or turning every filter to maximum.
Make one change at a time until your voice sounds clear and steady. Your audience should hear you, not the room echoing around the edges.