To make sound “snap into focus,” start by locating the first reflection points in your space, which are spots where sound bounces off surfaces before reaching your ears. Use mirrors or visual tools to find these spots on walls and ceilings. Once identified, add acoustic treatments like panels or diffusers at these locations to absorb or scatter reflections. Managing these surfaces helps reduce muddiness and sharpens your sound—continue for more tips on perfecting your acoustic environment.
Key Takeaways
- Identify first reflection points by observing where sound first bounces off surfaces using mirrors or movement.
- Use acoustic panels or diffusers at reflection points to absorb or scatter sound, reducing echoes.
- Hard surfaces like glass or metal cause strong reflections; soften these with textured or absorptive materials.
- Proper placement of treatments at reflection points enhances clarity and prevents muddiness in sound.
- Fine-tune environment by testing sound after adjustments, ensuring reflections are minimized for crisp audio focus.
Understanding the Concept of First Reflection Points

Understanding the concept of first reflection points is essential for optimizing acoustic environments. These points are where sound waves from your source bounce off surfaces like walls, ceilings, or furniture before reaching your ears. When sound reflects directly into your listening area, it can cause echoes or muddiness, reducing clarity. Identifying these spots helps you control how sound interacts within the space, ensuring clearer, more focused audio. By managing first reflection points, you minimize unwanted echoes and improve speech intelligibility or musical detail. Recognizing where sound reflects early in its journey allows you to strategically place acoustic treatments to absorb or diffuse these reflections, making your environment sound more natural and balanced. This understanding is fundamental to creating a professional-quality listening or recording space. Additionally, employing innovative European cloud servers can support the deployment of advanced acoustic analysis tools, enhancing your ability to identify and treat reflection points with precision and accuracy. Incorporating soundproofing materials can further improve the control over reflections and improve overall acoustic quality. Moreover, using reflection mapping techniques can provide a visual representation of sound behavior within your space, aiding in more targeted treatments. Incorporating acoustic treatment techniques tailored to these reflection zones can significantly elevate the clarity and quality of sound within your environment.
How to Identify First Reflection Points in Your Space
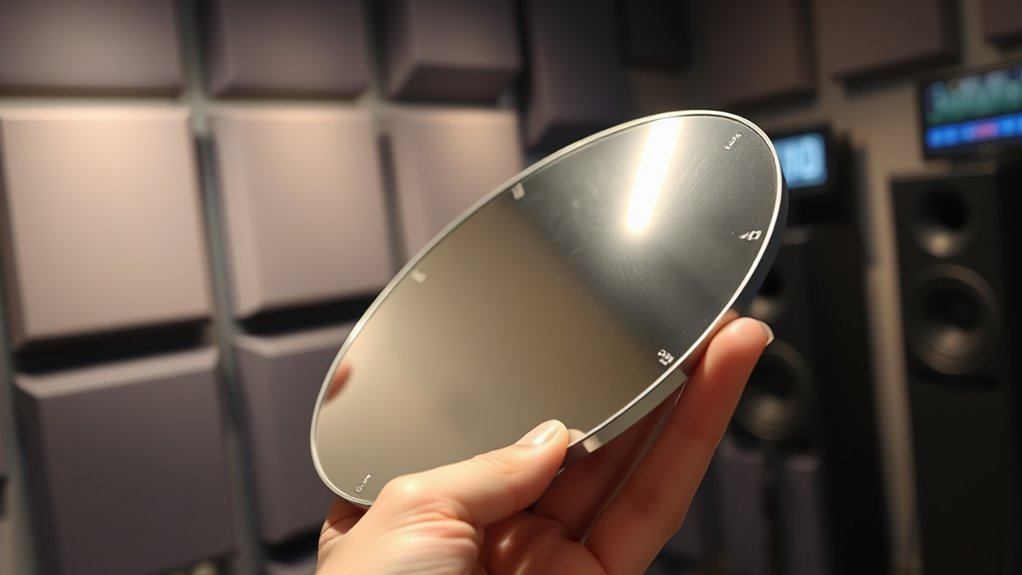
Ever wondered where the first reflection points are in your room? To find them, stand in your listening position and have a friend or mirror handy. Face the speaker or sound source, then slowly move your head or mirror along the walls and ceiling. Look for spots where sound from the speaker hits first and then bounces directly toward your ears. These are your first reflection points. You’ll notice that reflections come from surfaces directly in line with your ears’ position relative to the speakers. Focus on the areas where the sound seems to “bounce” first before reaching you. Mark these spots with painter’s tape or a small piece of paper. Identifying these points helps you target where to add acoustic treatments for clearer, more focused sound. Understanding the contrast ratio of your projector can also influence how you optimize your viewing environment for better sound and image clarity. Additionally, recognizing free floating acoustic panels can provide more flexibility in customizing your space for optimal sound quality.
Common Surfaces That Affect Sound Reflection

You’ll notice that surfaces like hard walls, glass, and metal reflect sound more strongly than softer materials. These reflective surfaces can create clear echoes or unwanted reverberations in your space. Understanding how textured and absorptive materials differ helps you control how sound behaves around these surfaces. Recognizing the impact of sound reflection is essential in managing environments affected by manipulation or psychological tactics. Being aware of acoustic properties can aid in designing spaces that minimize noise disturbances and improve overall sound quality. Incorporating knowledge of auditory processing can further enhance the effectiveness of sound management strategies.
Hard, Reflective Walls
Hard, reflective walls are among the most influential surfaces affecting sound reflection in a space. They bounce sound waves efficiently, creating strong reflections that can enhance clarity or cause unwanted echoes. These surfaces include materials like concrete, brick, tile, and polished wood. When sound hits these walls, it reflects sharply back into the room, often arriving at your ears moments after the direct sound. This can lead to a lively, vibrant atmosphere or, if uncontrolled, muddled sound and reverberation. To improve acoustics, you might consider adding absorptive materials or diffusers to balance these reflections. Understanding how hard, reflective walls influence sound helps you identify problem areas and implement effective solutions to make your space sound clearer and more focused. Proper acoustical treatment can significantly reduce unwanted echoes and improve overall sound quality. For example, incorporating sound-absorbing panels can help tame these reflections and create a more controlled acoustic environment. Additionally, placing diffusers strategically can help scatter sound waves more evenly, reducing sharp echoes and enhancing clarity. Being mindful of the reflection points on your walls can further optimize your acoustic treatment plan. Recognizing common surface materials that cause reflection can guide your choice of treatments and placement for maximum effect.
Glass and Metallic Surfaces
Glass and metallic surfaces are notable for their high reflectivity, markedly influencing how sound travels within a space. These surfaces bounce sound waves efficiently, creating strong reflections that can enhance clarity or cause unwanted echoes. When sound hits glass or metal, very little energy is absorbed, so the reflections are sharp and direct. This high reflectivity can sometimes lead to acoustic issues such as harsh ringing or muddled speech, especially in enclosed areas. To control these reflections, consider adding absorptive elements nearby or strategically positioning the speaker and listener. Be mindful of large glass windows, metallic fixtures, or decorative metal panels, as they can dramatically alter the acoustic environment. Understanding how these surfaces reflect sound helps you make smarter choices for optimizing your space’s acoustics. Incorporating sound absorption techniques in the design can significantly improve overall sound quality and comfort. Additionally, being aware of room geometry can help in designing spaces that minimize problematic reflections and improve sound clarity. Recognizing the role of surface materials can further guide you in selecting appropriate finishes to manage sound reflection effectively. Using appropriate furniture and décor can also help diffuse sound waves and reduce harsh reflections for a more balanced acoustic environment.
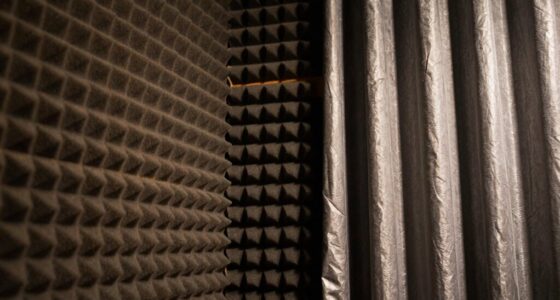
Textured, Absorptive Materials
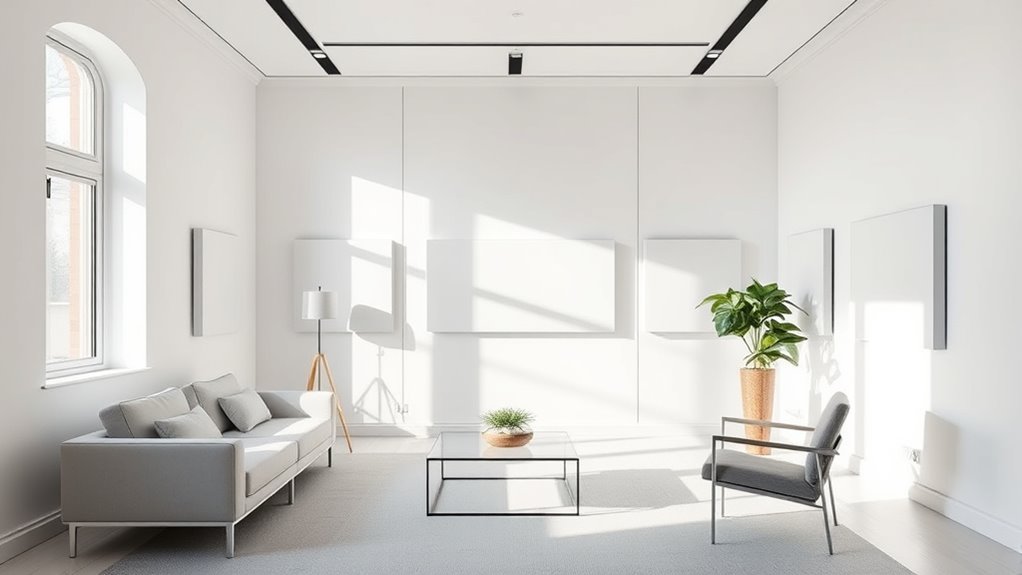
How do textured and absorptive materials influence sound reflection in a space? These surfaces reduce sound bouncing around by absorbing energy instead of reflecting it. Textured materials, like acoustic panels or rough fabrics, break up sound waves, scattering them in different directions. Absorptive surfaces, such as foam or thick curtains, convert sound energy into heat, minimizing echo and reverberation. This helps create a clearer, more focused sound environment. When you incorporate these materials, you’ll notice less harshness and muddiness in your space’s acoustics. They’re especially useful in rooms where clarity matters, like recording studios or home theaters. By strategically placing textured and absorptive surfaces, you control how sound behaves, making it easier to achieve that crisp, focused audio you’re after.
Tools and Techniques for Locating Reflection Points
You can identify reflection points effectively using tools like reflection maps, which show where sound bounces. Employing sound test tones helps you pinpoint these spots by revealing changes in sound behavior. Visualizing sound waves with specialized software makes it easier to see where reflections occur, guiding your adjustments. Additionally, incorporating knowledge of acoustic treatment techniques can optimize your space for better sound quality.
Using Reflection Maps
Have you ever wondered how professionals pinpoint reflection points on surfaces? Reflection maps are invaluable tools for this. They provide a visual reference of how sound waves bounce within a space. By analyzing these maps, you can identify where sound reflections first arrive at a surface. To use them effectively, start by creating or obtaining a detailed reflection map of your room. Then, compare it with your space’s layout, focusing on key surfaces like walls, ceilings, and corners. This method helps you see potential reflection points clearly, even before doing any physical testing. Reflection maps streamline the process, making it easier to target specific areas for treatment. They’re especially useful when you want to optimize your room acoustics quickly and accurately. Understanding sound wave behavior enhances your ability to interpret reflection maps effectively.
Employing Sound Test Tones
Sound test tones are powerful tools for accurately locating reflection points in a room. When you play these tones, you can identify where sound waves bounce and create echoes. This process helps you find the areas that need treatment to improve clarity. To get started, try these techniques:
- Play a pure tone at a moderate volume to ensure clarity.
- Slowly move around your room, listening for areas where the sound seems to “ring” or echo.
- Use a handheld microphone or speaker to pinpoint reflection points precisely.
- Mark spots where reflections are loudest or most noticeable, so you know exactly where to treat.
Additionally, understanding how sound test tones interact with room surfaces can guide you in making effective acoustic treatments.
Visualizing Sound Waves
Ever wonder how to see sound waves and better understand where reflections occur in a room? Visualizing sound waves helps you identify reflection points accurately. Tools like laser pointers and specialized software reveal how sound travels and bounces. You can also use a microphone connected to an oscilloscope to see wave patterns in real-time. This visualization guides you to treat first reflection points effectively. Here’s a quick overview:
| Tool | How It Works | Best For |
|---|---|---|
| Laser Pointer | Projects a laser beam to visualize sound paths | Spotting reflection angles |
| Oscilloscope | Displays wave patterns of sound | Analyzing wave behavior |
| Room Simulation Software | Creates 3D models of sound reflections | Planning acoustic treatments |
Harness these tools to pinpoint reflection points and improve your room’s sound clarity. Understanding sound behavior can further enhance your acoustic treatment strategies.
Practical Methods to Address Reflection Points

To effectively address reflection points, you need practical strategies that promote clarity and growth. First, identify your primary reflection spots by moving around your space and listening carefully. Second, use targeted placement of acoustic panels or diffusers directly at these points to absorb or scatter sound waves. Third, consider furniture arrangements—positioning bookshelves or soft furnishings can help break up reflections naturally. Fourth, test and adjust: listen closely after each change, fine-tuning your setup until sound feels more focused. These steps empower you to transform a muddled sound environment into one that’s clear and vibrant. Taking action on reflection points isn’t just about sound; it’s about creating an environment where every note and nuance can be experienced fully.
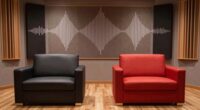
Using Acoustic Treatments to Enhance Sound Clarity
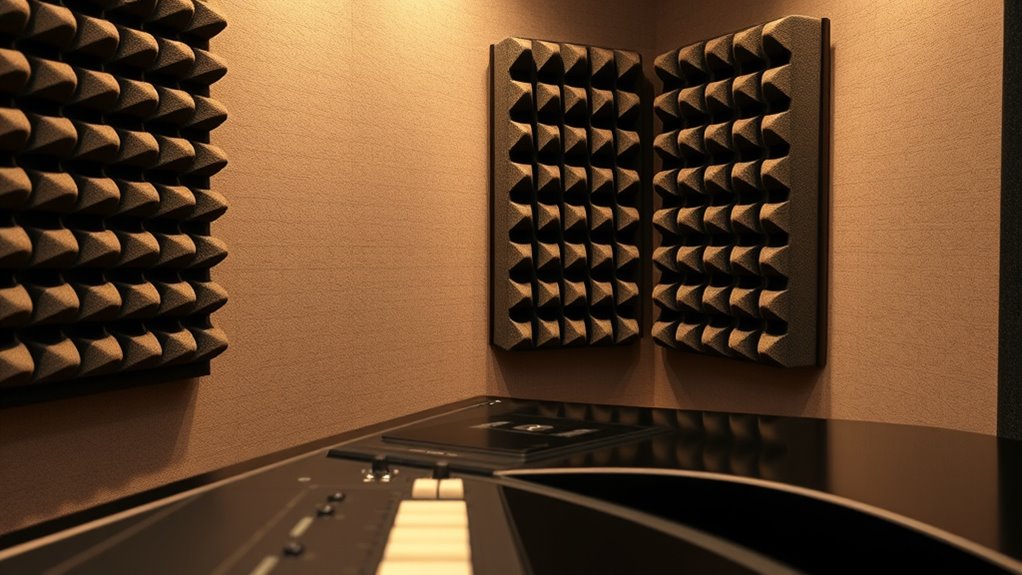
Once you’ve identified your reflection points and made initial adjustments, implementing acoustic treatments can substantially boost sound clarity. These treatments absorb or diffuse sound waves, reducing echo and unwanted reflections. By strategically placing panels, bass traps, or diffusers, you create a more controlled environment. This results in clearer vocals, tighter bass, and more precise instrument separation. Proper placement of these treatments is essential for optimal results, and understanding the fundamentals of sound absorption can guide effective setup. Here’s a quick visual:
| Treatment Type | Placement Area | Effect |
|---|---|---|
| Acoustic Panels | Walls near reflection points | Absorbs mid/high frequencies |
| Bass Traps | Corners | Controls low frequencies |
| Diffusers | Back wall | Scatters sound evenly |
| Foam Panels | Side walls | Reduces flutter echoes |
| Ceiling Tiles | Above listening area | Diminishes ceiling reflections |
Using these treatments turns your space into a focused, professional-sounding environment.
Tips for Setting Up Reflective and Absorptive Surfaces
Setting up effective reflective and absorptive surfaces requires careful positioning to optimize sound quality. You want to create a balanced environment that enhances clarity and reduces unwanted echoes. Here are four tips to help you achieve that:
- Identify key reflection points—use your hand or mirror to find where sound bounces directly toward your listening position.
- Place absorptive materials at these points to tame harsh reflections and create warmth.
- Position reflective surfaces strategically behind or beside your speakers to bounce sound toward the listener.
- Avoid clutter and uneven surfaces that scatter sound unpredictably, ensuring a smooth, focused acoustic space.
Following these steps brings your sound into sharp focus and transforms your listening experience.
Troubleshooting and Fine-Tuning Your Acoustic Environment

Even with careful setup, acoustic issues can still arise, making troubleshooting essential to achieve ideal sound quality. If your sound feels muddled or uneven, start by identifying problem areas—listen for echo, dead spots, or harshness. Move speakers and acoustic panels slightly to see if the sound improves. Use a mirror or foam core to locate first reflection points, ensuring they’re properly treated. Check for unintended reflective surfaces nearby, like glass or bare walls, and add absorptive materials if needed. Adjust speaker angles and positions to optimize direct sound. If high frequencies are harsh, consider adding diffusers or diffusive panels. Fine-tuning involves patience—small tweaks can make a significant difference, bringing clarity and focus to your listening environment.
Frequently Asked Questions
Can First Reflection Points Improve Sound Quality in Small Home Studios?
Yes, first reflection points can notably improve sound quality in your small home studio. By placing acoustic panels or foam at these spots, you reduce early reflections that cause muddiness and echo. This helps your recordings sound clearer and more focused. You’ll notice a more professional, balanced sound, making it easier to mix and produce high-quality audio. Taking this simple step can make a big difference in your studio’s acoustics.
Are There Specific Tools Recommended for Beginners to Find Reflection Points?
Think of reflection points like the secret spots on a treasure map—you need to find them to unlock perfect sound. For beginners, a simple mirror or a handheld mirror works wonders; you just hold it at ear level and move around your room. Alternatively, use your smartphone’s camera to spot where sound waves bounce. These tools help you identify reflection points quickly, making your studio sound clearer and more professional.
How Do Different Room Shapes Influence the Placement of Reflection Points?
Different room shapes markedly influence where you should place reflection points. In rectangular rooms, position reflection points on side walls and ceiling to optimize sound clarity. Irregular or curved rooms scatter reflections differently, so you might need to experiment with placement to find the best spots. Use your ears to identify where reflections cause muddiness or echo, then target those areas with acoustic treatments to improve sound focus.
Can DIY Solutions Effectively Target Reflection Points Without Professional Help?
Yes, DIY solutions can effectively target reflection points and improve sound clarity. You can experiment with simple fixes like hanging thick curtains, placing bookshelves strategically, or adding soft furnishings to absorb reflections. These low-cost, easy-to-implement ideas often make a noticeable difference, saving you both time and money. Just be patient, test different arrangements, and trust your ears to find the perfect setup for your space.
What Are the Signs Indicating Problematic Reflection Points in a Space?
You’ll notice problematic reflection points when sound feels uneven, echoes linger, or certain areas seem overly bright or muffled. If speech becomes hard to understand or if you hear sudden, sharp reverberations, these are clues that reflections are disrupting your space. You might also feel a sense of discomfort or distraction in specific spots. Identifying these signs helps you target areas needing treatment to improve sound clarity and reduce unwanted reflections.
Conclusion
By applying these techniques, you’ll transform your space into a clear, focused sound environment. Imagine you’re recording vocals, and suddenly, your voice snaps into perfect clarity—no echoes or muddiness. For example, a home studio owner used reflection points to reduce harsh reflections, resulting in a professional sound. With a little effort and the right tools, you can make every note and word sound crisp, sharp, and perfectly in focus.