
To prevent a spaghetti setup, start by evaluating your device needs and mapping out your space. Choose the correct cables and accessories, then plan clear, logical routing paths that avoid crossing or clutter. Label each cable at both ends and document your layout for easy troubleshooting. Use cable management tools like clips and ties, leave extra length for flexibility, and test everything before finalizing. Following these tips helps keep your system organized and reliable—stick around to learn more.
Key Takeaways
- Map device locations and plan direct, logical cable routes to minimize crossings and clutter.
- Use labels, diagrams, and documentation to track cable paths and facilitate troubleshooting.
- Select appropriate cable types and lengths, incorporating space‑saving routing techniques like conduits or trays.
- Secure cables with clips, ties, and sleeves to maintain organization and prevent tangling.
- Regularly review and update your cable plan to adapt to changes and ensure system reliability.
Assess Your Connectivity Needs

Before selecting cables, you need to clearly understand your connectivity needs. Determine what devices require connection—computers, printers, smart home gadgets, or entertainment systems. Consider the data transfer speeds each device needs; streaming high-definition video or gaming demands faster, more reliable cables. Think about future expansion as well; will you add more devices later? Identify whether you need wired connections for stability or wireless options for flexibility. Also, check the physical distances between devices and your router or switch, as longer runs may require specific cable types. By mapping out these needs now, you’ll avoid under- or over-buying cables, saving money and reducing clutter. Clarifying your requirements guarantees you pick the right cables for a smooth, efficient setup. Understanding projector technology can help ensure your cables support the desired resolution and image quality. Additionally, considering your network topology can help optimize cable placement and performance, and understanding home network design principles can further enhance your setup’s reliability. Incorporating knowledge of European cloud innovation can also guide you towards more sustainable and secure connectivity solutions. Recognizing the importance of scalable network architecture can assist in planning your setup for long-term growth and adaptability.
Map Out Your Space and Layout
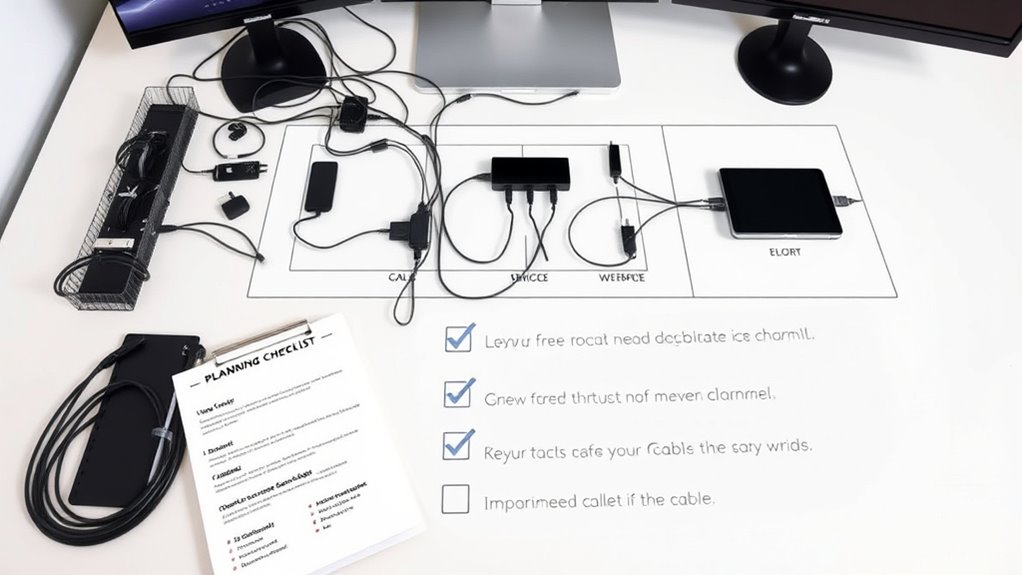
To guarantee your cables are installed efficiently and neatly, start by mapping out your space and layout. Measure the areas where devices will be placed and identify the shortest, most direct routes for cables. Consider obstacles like furniture and walls that could affect cable paths. Use a simple diagram or floor plan to visualize the setup, ensuring you anticipate cable lengths and placement. This helps prevent clutter and tangled cords later on. To illustrate, here’s a quick overview:
| Area | Device Placement | Cable Path |
|---|---|---|
| Desk | Monitor, PC | Under desk, along wall |
| Entertainment | TV, speakers | Along baseboards |
| Office Corner | Printer, router | Behind furniture |
Mapping guarantees a clean, organized setup from the start, and incorporating cable management techniques can further enhance organization and safety. Additionally, understanding net worth and other personal details of those involved can help tailor your space to reflect your lifestyle and preferences. Proper planning is especially important when considering the best gelato in Laguna Beach to create a relaxing environment for your leisure time. Being aware of network infrastructure needs can also guide your cable choices and placement to ensure reliable connectivity throughout your space. Incorporating cable clips or sleeves can further help secure cables and reduce clutter, making your setup both functional and visually appealing.
Choose the Right Cables and Accessories

Choosing the right cables and accessories is essential for a reliable and efficient setup. Start by matching cable types to your devices’ needs—HDMI for video, Ethernet for internet, and power cables for energy sources. Use high-quality cables to prevent signal loss and ensure durability. Opt for cables with the correct length—neither too short nor excessively long—to avoid clutter and tangling. Consider accessories like cable clips, sleeves, or ties to organize and secure cables neatly. Avoid mixing incompatible connectors, which can cause connection issues. Label your cables clearly at both ends for easy identification during troubleshooting or future updates. Paying attention to cable standards such as UL and HDMI ensures your cables meet safety and quality benchmarks. Additionally, understanding system compatibility helps prevent potential issues down the line. Proper cable management not only enhances performance but also reduces clutter, making your setup more professional and easier to maintain. Investing in the proper cables and accessories upfront saves time, reduces mess, and helps maintain a clean, professional setup. Being aware of future expansion needs can also guide your choices for more adaptable configurations.
Plan Cable Routing Paths

Start by mapping secure pathways that keep cables protected and organized. Make certain to avoid crossings and clutter that can cause confusion or damage. Additionally, consider local automation capabilities to plan routing that minimizes interference with smart home devices. Finally, label and document each route clearly to ensure easy maintenance and troubleshooting later on. Incorporating space‑saving techniques can also help optimize your cable routing and reduce unnecessary tangles. Using tools to detect passive voice can further improve clarity and professionalism in your documentation. To enhance overall efficiency, evaluating cable management standards can ensure your setup adheres to best practices for safety and organization. Moreover, integrating smart home system compatibility considerations during planning can help prevent future connectivity issues.
Map Secure Pathways
Mapping secure pathways is a crucial step in planning your cable routes, guaranteeing that cables are organized, protected, and easily accessible. Proper mapping helps prevent tangles, minimizes damage, and streamlines future adjustments. When charting your pathways, consider the environment, potential interference, and ease of access for maintenance. Use clear labels and diagrams to visualize routes before installation. This proactive approach reduces surprises during setup and guarantees a tidy, efficient system. Additionally, identify natural channels such as walls, ceilings, or existing conduits to leverage their support. Planning ahead minimizes crossings and clutter, keeps cables out of high-traffic areas, and safeguards against accidental damage. With well-mapped pathways, your setup becomes more reliable, safer, and easier to troubleshoot later on. Always incorporate practical, room-by-room solutions to ensure your entire home remains organized and functional.
Avoid Crossings and Clutter
Effective cable routing requires careful planning to prevent crossings and clutter that can complicate installation and maintenance. Start by visualizing the entire pathway before laying cables, choosing straight, logical routes that follow the shortest and most direct paths. Avoid crossing cables over one another, as this creates confusion and potential interference. Use cable trays, conduits, or raceways to keep cables organized and separated, reducing tangles and making future upgrades easier. Keep high-traffic areas clear of cables to prevent tripping hazards and accidental disconnections. Consider the placement of power and data cables to minimize electromagnetic interference. Regularly review your plan to identify potential bottlenecks or clutter zones, adjusting routes as needed to maintain a clean, organized setup. Incorporating innovative routing techniques can further streamline the process and enhance system reliability, especially when considering sound wave interference factors that might affect sensitive equipment.
Label and Document Routes
Have you clearly labeled and documented your cable routes? Proper labeling and documentation help prevent confusion, reduce troubleshooting time, and maintain an organized setup. When you track each route, you’ll easily identify cables during maintenance or future upgrades. Use clear labels at both ends of each cable, noting its purpose and destination. Keep a detailed diagram or map showing the routing paths, including bends, connections, and cable types. Regularly update your documentation as changes occur. This approach minimizes accidental disconnections and tangled cables, saving you time and effort. Incorporate cable management best practices to optimize your setup and ensure safety. Utilizing proper cable organization techniques can further streamline your setup and prevent common issues, especially in environments where building and legal considerations impact installation.
Label and Document Your Cables

You should use clear labels on all your cables to identify their purpose quickly. Make sure your wiring diagrams are always up to date to reflect any changes. Proper labeling and documentation help prevent confusion and save time during maintenance or troubleshooting.
Clear Cable Labels
Why is it essential to clearly label and document your cables during planning? Because it saves you time, reduces errors, and makes troubleshooting much easier later on. When cables are properly labeled, you can quickly identify their purpose, connections, and destinations without guesswork. Documentation ensures you have a record of your setup, which is invaluable for future upgrades or repairs. Clear labels prevent accidental disconnections and help maintain an organized workspace.
Consider these points:
- Use consistent, easy-to-read labels for all cables
- Include essential info like source, destination, and function
- Keep labels visible and durable for long-term use
- Maintain a detailed cable map or spreadsheet
- Regularly update labels and documentation as your setup evolves
Maintain Up-to-Date Diagrams
Keeping your cable diagrams current is essential for efficient management and troubleshooting. Regular updates ensure you always know where every cable runs, reducing confusion during maintenance. Use clear symbols, labels, and organized layouts to make diagrams easy to interpret. Review and revise diagrams whenever you add, move, or remove cables. This practice prevents outdated documentation from causing errors or delays. To help, consider this example layout:
| Cable Type | Connection Points | Notes |
|---|---|---|
| Ethernet | Switch to Server | Use yellow cables |
| Power | UPS to Router | Check for wear |
| Audio | Mixer to Speakers | Label both ends |
Maintaining accurate diagrams saves time, minimizes mistakes, and keeps your setup tidy. Regular updates turn complex wiring into a manageable, visual plan you can trust.
Use Cable Management Tools

Effective cable management begins with using the right tools to keep your setup organized and safe. These tools help prevent tangles, reduce clutter, and make maintenance easier. Invest in cable clips, zip ties, Velcro straps, cable sleeves, and cable labels. Cable clips attach neatly to surfaces, guiding cables along fixed paths. Zip ties secure bundles tightly, preventing accidental disconnections. Velcro straps are reusable and flexible, ideal for adjusting as your setup evolves. Cable sleeves protect multiple cables from damage and keep them contained. Labels identify cables quickly, saving time during troubleshooting. Using these tools ensures a tidy, professional look, minimizes hazards, and improves airflow for cooling. Proper cable management tools are essential for a safe, efficient, and scalable setup.
Allocate Extra Length for Flexibility

Allocating extra length when planning your cables provides the flexibility needed to accommodate changes, repairs, or future upgrades. By leaving additional slack, you prevent tension on connectors and avoid accidental disconnections. This extra length makes rerouting or extending cables easier without reinstalling everything from scratch. Consider the specific setup; longer runs might need more slack, especially in areas prone to movement or repositioning. Be mindful not to overdo it—excessive slack can create clutter or tripping hazards. Instead, aim for a balance, providing enough extra length to handle adjustments while keeping your setup tidy. Properly allocated extra length simplifies maintenance and reduces the risk of damaging cables during modifications. This small step saves time and effort, keeping your setup functional and organized.
Test and Adjust Before Finalizing
Before finalizing your cable setup, it’s essential to thoroughly test and adjust each connection to guarantee everything functions properly. This step ensures your system works seamlessly and prevents future troubleshooting. Start by powering on your devices and checking signal quality. Confirm that all connections are secure and that no cables are loose or damaged. Make sure each device responds correctly and that data flows smoothly. Adjust cable lengths if needed to avoid tension or slack, which can cause issues later. Double-check labels and connections against your plan to prevent miswiring. Finally, verify that your setup meets your performance expectations.
- Test each device individually for proper operation
- Confirm signal strength and clarity
- Check for any interference or noise
- Ensure cables are not strained or pinched
- Document your setup for future reference
Maintain and Regularly Review Your Setup

To keep your cable setup running smoothly, you need to maintain it regularly and review its performance. Check connections to verify they’re secure and free of corrosion or damage. Organize cables using labels and cable management tools, like clips or ties, to prevent tangling. Periodically evaluate your setup for signs of wear, looseness, or clutter that could cause issues. Update your labeling and routing plans if your equipment changes or expands. Regular reviews help identify potential problems early, saving time and avoiding disruptions. Keep a maintenance schedule to perform these checks consistently. Staying proactive ensures your setup remains clean, functional, and efficient, preventing the chaos of a tangled, unreliable mess. Regular maintenance is key to a durable, organized cable system.
Frequently Asked Questions
How Often Should I Revisit and Update My Cable Plan?
You should revisit and update your cable plan whenever you make significant changes to your setup, such as adding new devices or rearranging equipment. Regularly reviewing it every few months helps identify potential issues and keeps everything organized. Also, after troubleshooting or experiencing connectivity problems, update your plan to reflect any repairs or adjustments. Staying proactive guarantees your cables remain tidy, accessible, and functional, preventing future chaos.
What Are Common Signs of Cable Congestion or Issues?
Cable congestion is like traffic on a busy highway—slow and frustrating. You’ll notice devices struggling to connect, frequent disconnects, or slow speeds. If cables are tangled or labels are unclear, it’s a sign of chaos waiting to happen. Overheating or physical damage also indicates issues. Regularly inspecting your setup and keeping cables organized helps prevent congestion and keeps your network running smoothly, avoiding those pesky disruptions.
Can I Use Wireless Alternatives to Reduce Cable Clutter?
Yes, you can use wireless alternatives to reduce cable clutter. Wireless solutions like Wi-Fi, Bluetooth, and wireless HDMI devices help eliminate many cables, making your setup cleaner and more organized. Guarantee your devices support these options and have strong signal strength. Keep in mind, some applications may require wired connections for stability, but for most everyday tasks, wireless tech provides a convenient and clutter-free alternative.
How Do I Ensure Safety When Managing Multiple Cables?
You guarantee safety by organizing cables properly, avoiding tripping hazards, and securing loose cords. Use cable ties or velcro straps to keep cables neat and prevent tangling. Keep cables away from heat sources and water to avoid damage or electrical hazards. Regularly inspect cables for wear or damage, replacing any frayed or broken ones. Always unplug devices before handling or adjusting cables to prevent electrical shocks.
What Budget Considerations Should I Keep in Mind for Cable Management?
Did you know poor cable management can increase setup costs by up to 30%? To stay within budget, prioritize quality over quantity, investing in durable cable ties and organizers. Plan your cable routes carefully to avoid unnecessary expenses from rework. Consider bulk purchasing discounts and reuse existing cables when possible. Keep an eye on your overall project costs, and don’t forget to allocate funds for regular maintenance and future upgrades.
Conclusion
Think of your cable setup as a garden—careful planning and regular tending guarantee it blossoms without chaos. By following this checklist, you’re planting the seeds for a tidy, efficient space that grows with you. When you prioritize organization, you’re nurturing a foundation that supports your work and creativity. Remember, a well-managed cable system isn’t just about connections; it’s about cultivating clarity and harmony in your environment. Your organized space will flourish, free from the weeds of clutter.